How to Create Lounge Rooms for your Webinar or Virtual Event
Lounge rooms are similar to breakout rooms and are individual rooms separate from the main stage. Each lounge room can hold up to 16 people on camera/mic although up to 200 people can view/watch each lounge room in “watch mode.”
Within Welcome's webinar platform the difference between lounge rooms and breakout rooms is the following:
- Lounge rooms have no assignments required, attendees can pick and choose which rooms to join once they are open whereas breakout rooms require assignment
- Lounge rooms can have additional branding and CTAs associated with each room whereas breakout rooms cannot
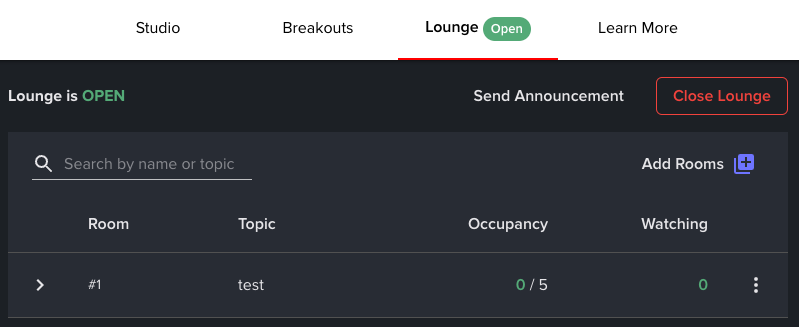
To create lounge rooms for your event or webinar, navigate to the Welcome Studio of your event and click on the “Lounge” tab in the top navigation.

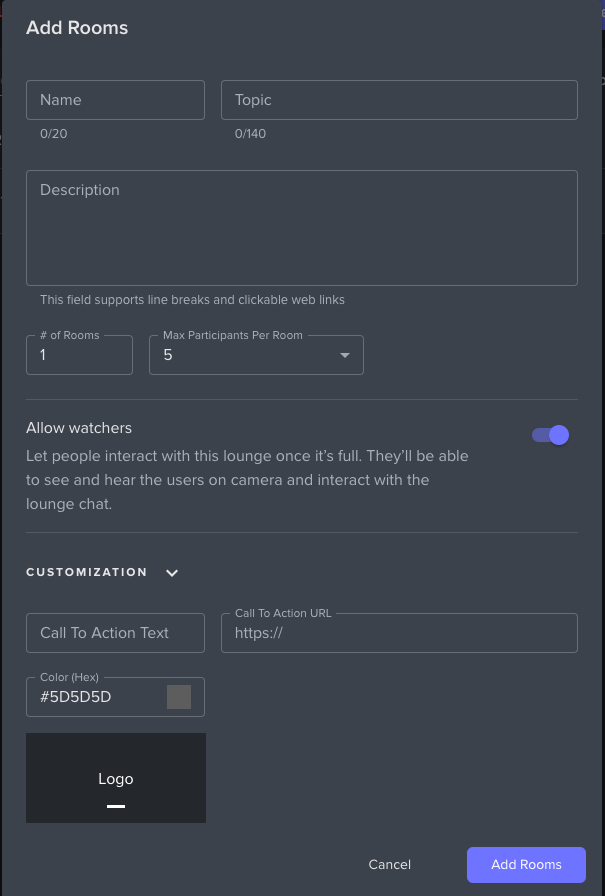
To add a room, click “Add Rooms”. You will be prompted with a window enabling you to add a name, topic, and description of the lounge room.
You can also edit the number of rooms you want to create (you can always add/remove more later) along with the maximum number of participants for each room (max is 16).
In addition, you can add a CTA for the room, URL for that CTA, and add branding elements such as a primary color and logo for that room. These features are typically leveraged for sponsorship or marketing purposes.

After you add the name, topic, and description, simply click “Add Rooms”.
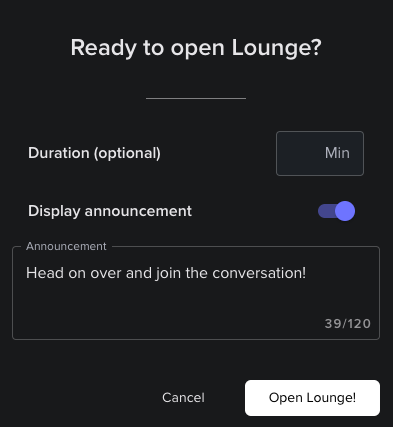
During the event, when you are ready to open the lounge rooms, navigate back to this page and click the “Open Lounge” button.

You will be prompted to confirm you are ready to open the lounge, along with presented to add an optional duration of the lounges and announcement.

Note: If you do NOT set a duration limit for how long the lounges will be open, you will need to return to this page to close the lounges (see “Close Lounge” button below).

When opening the lounge, your attendees will see the announcement at the top of the page and the Lounge tab will appear for them at the top navigation enabling them to join a lounge room.


