
Join 5000+ marketers that receive The Drip newsletter covering the most relevant topics in B2B marketing.
Hubspot Integration Documentation
Overview
Welcome’s Hubspot integration enables customers to capture contacts with Welcome and create/update corresponding contact records within Hubspot. In addition, Welcome can send the contact’s related actions - such as data from a custom registration field or in-app behaviors/actions like “clicked on a CTA” to help inform the next step of that contact’s buyer's journey.
The integration is streamlined to require minimal configuration. It makes it so your Hubspot Contacts need only click a link to get into an event, without going through registration. It sends back clear, easy-to-interpret signals of attendee sentiment, in real-time, for follow-up action. Some examples of things you can do with the Welcome integration are:
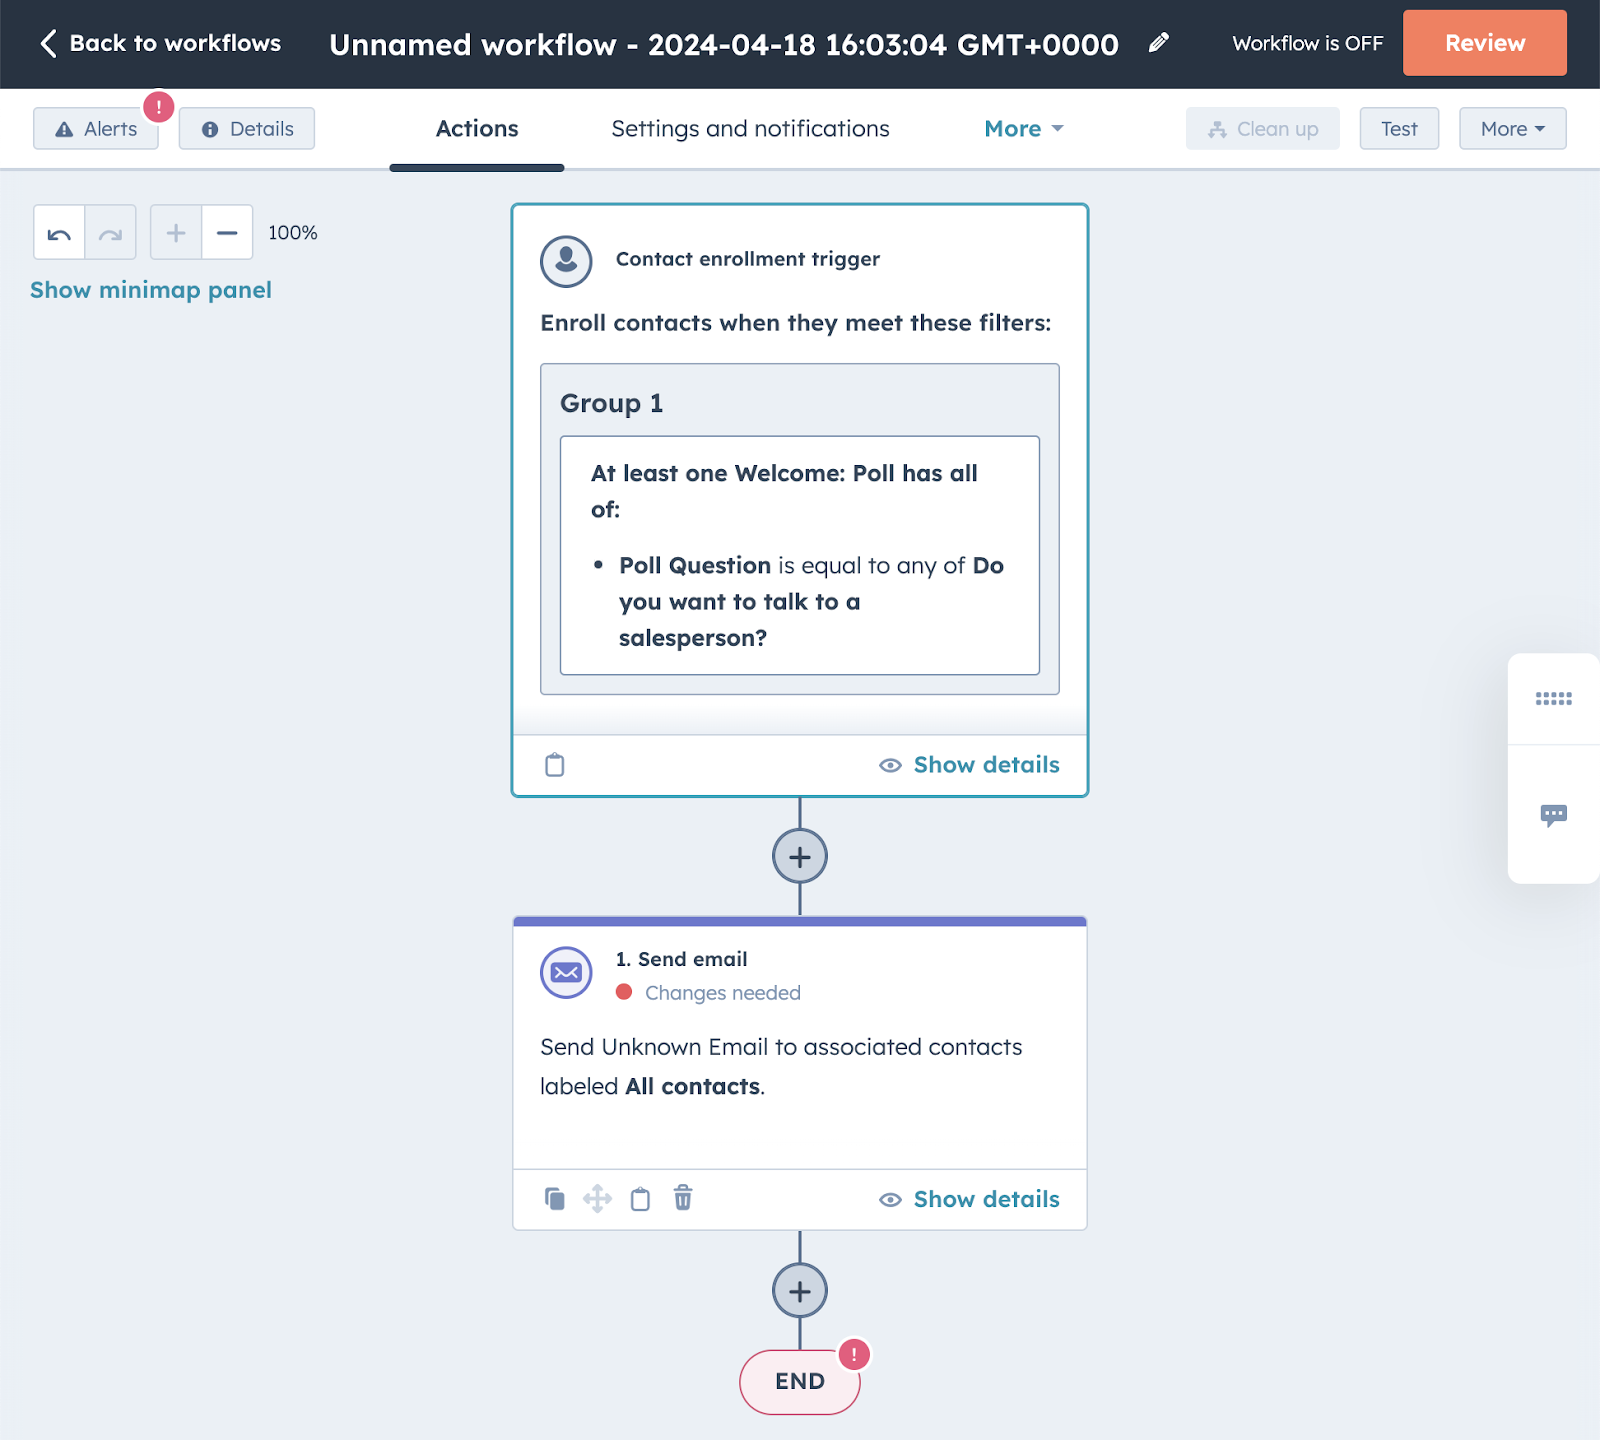
- Signal an Account Executive in real time when their prospect is attending one of your Webinars, or when a qualified account engages with a “Do you want to talk to a Salesperson?” Poll

- Increase the Hubspot lead score by 25 points for any lead which has spent more than 10 minutes at a specific Webinar.

- Create new Contacts for people who attend your webinars with their custom registration fields
Setup – Connecting Welcome to your Hubspot Instance
- Log in to your Welcome Producer Account at app.experiencewelcome.com
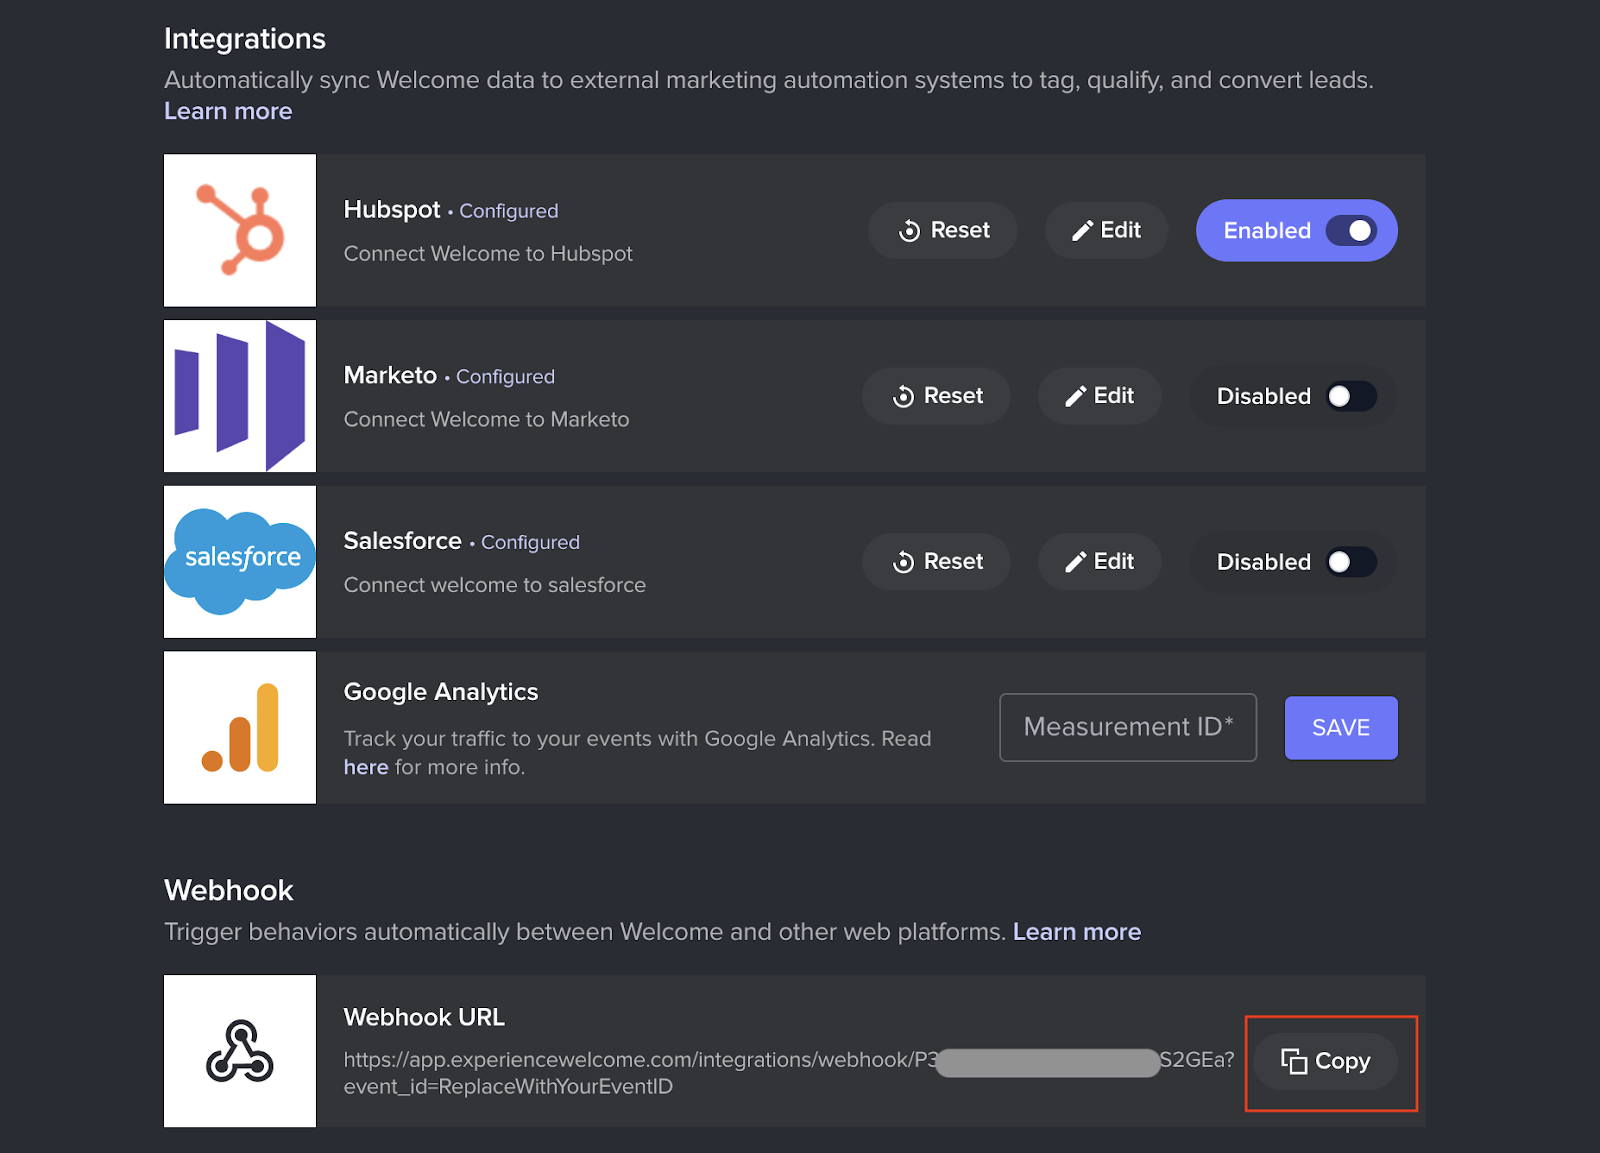
- Navigate to Integrations
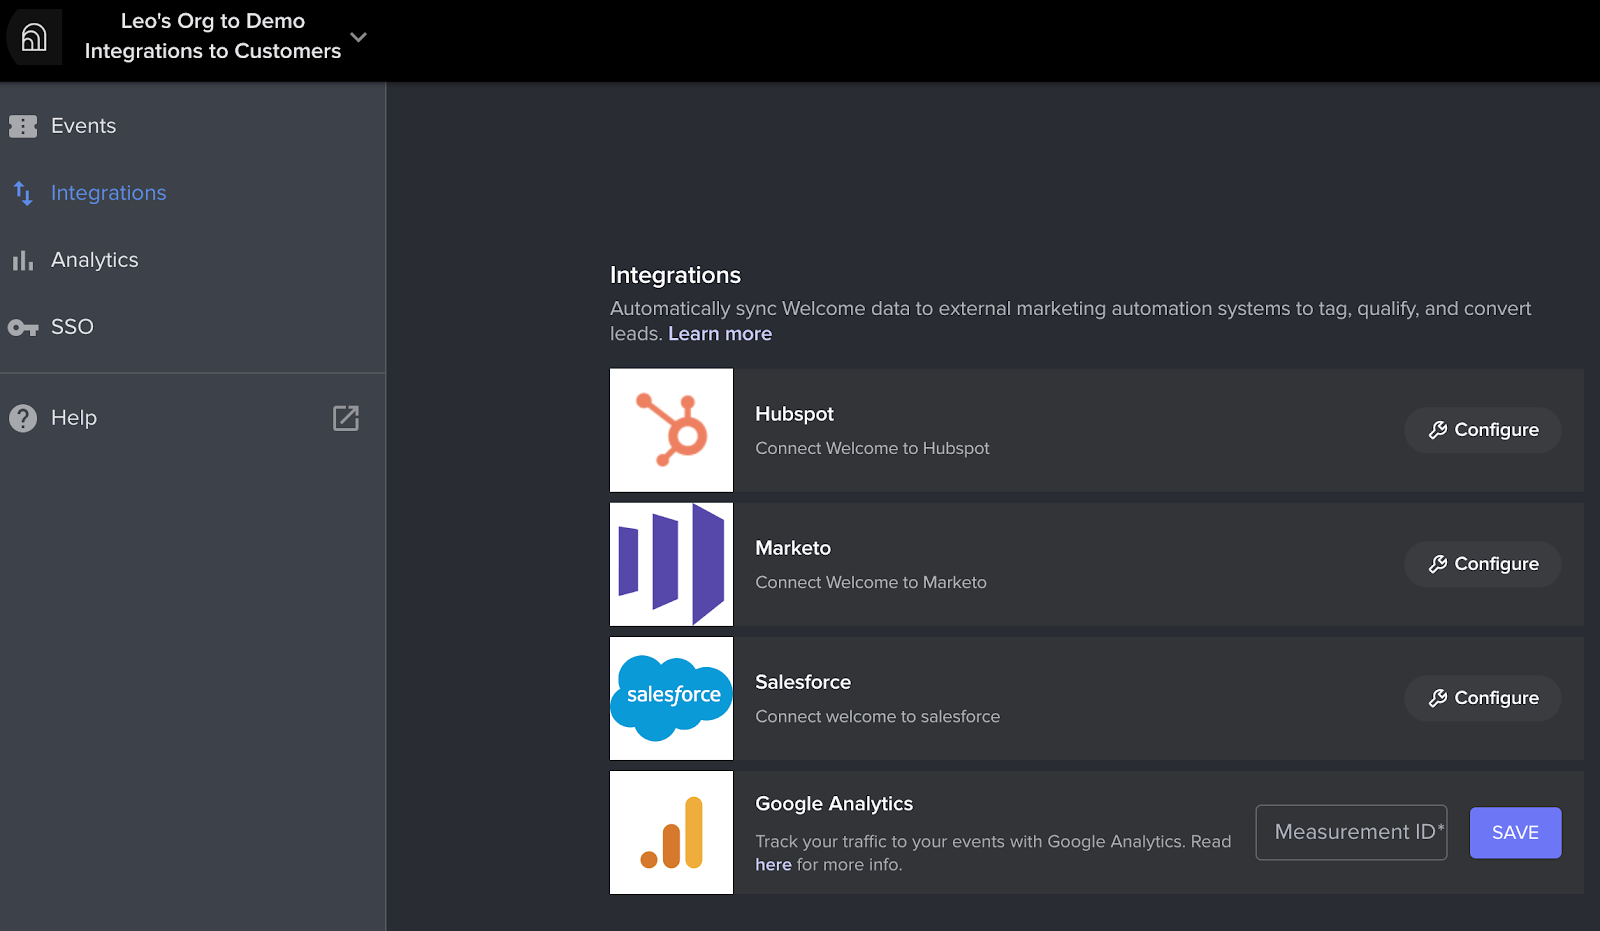
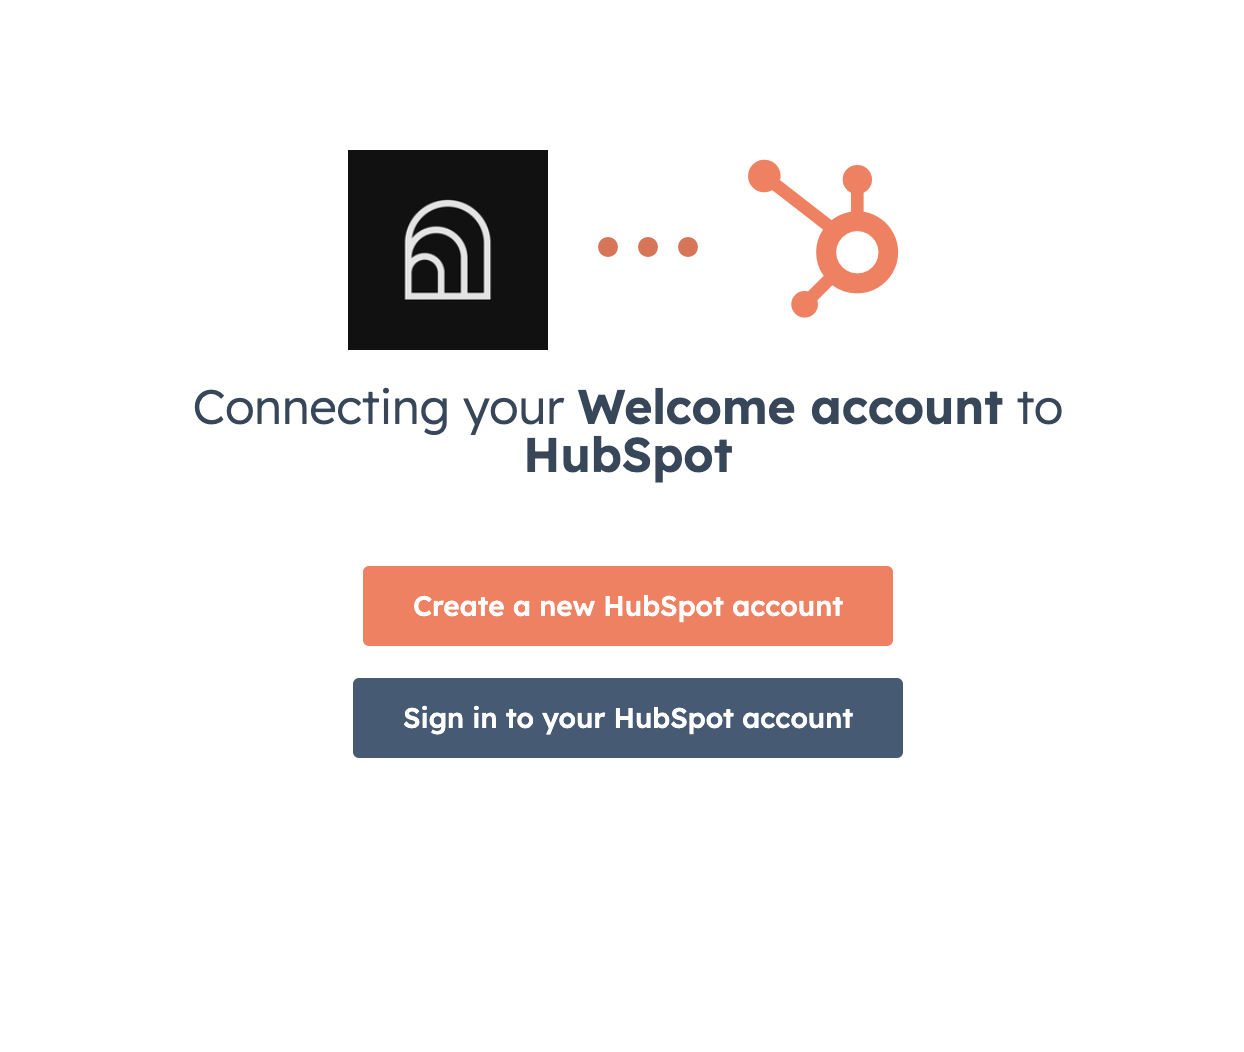
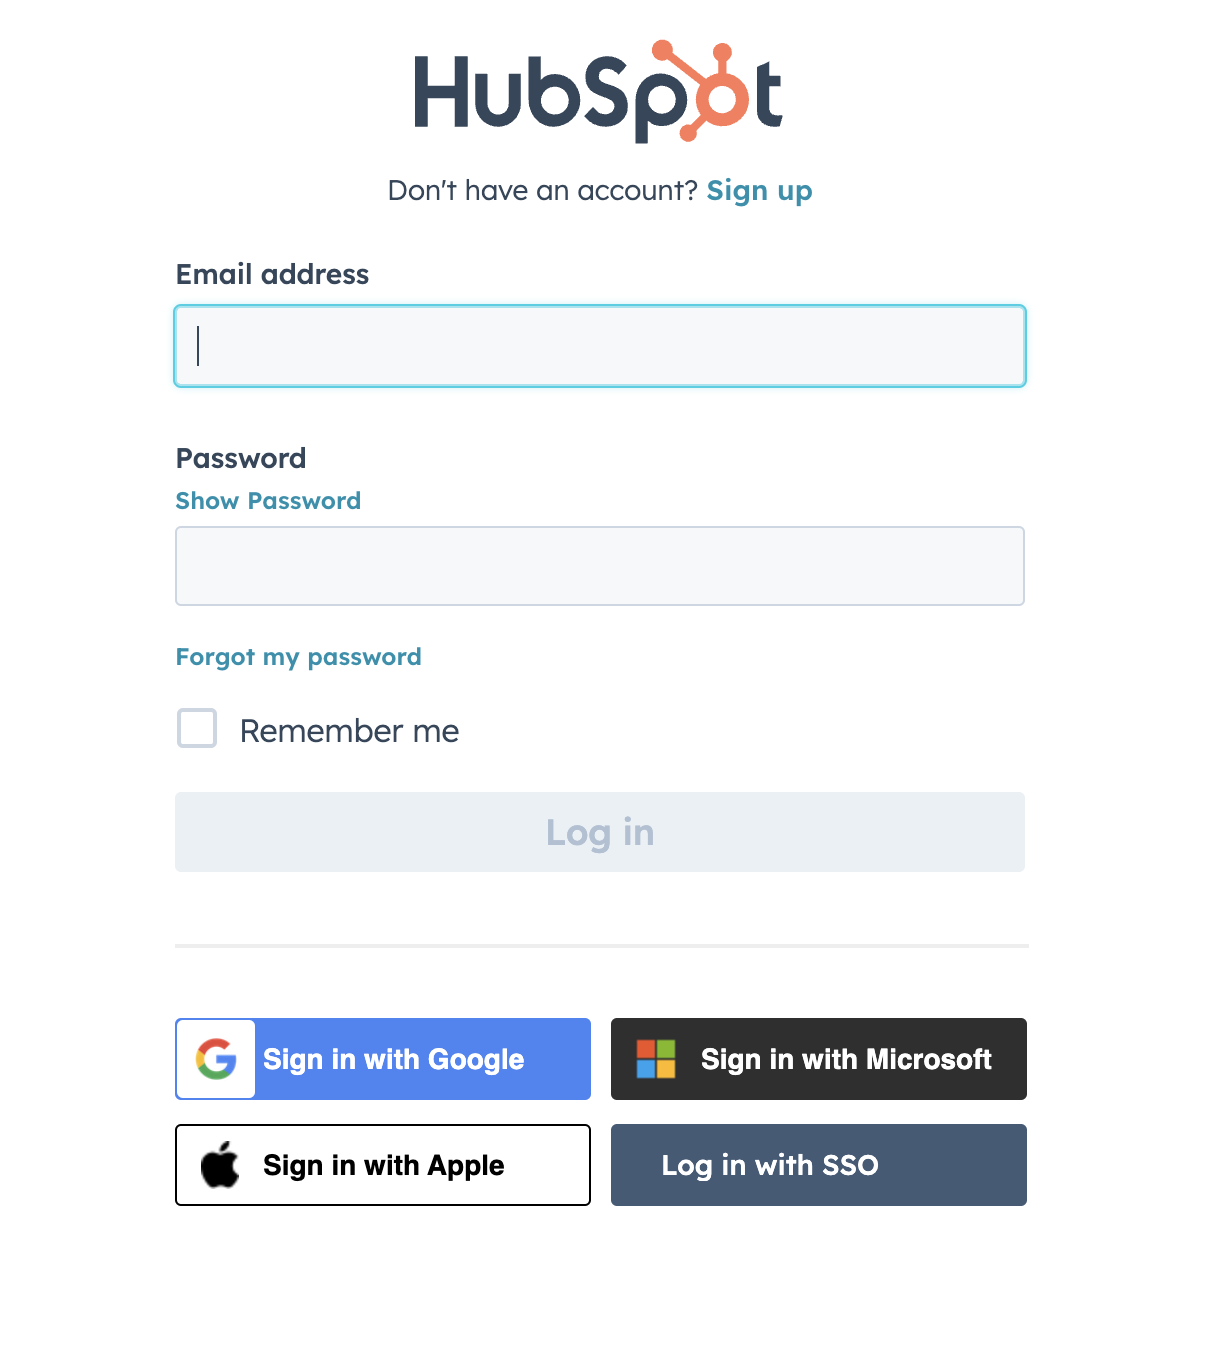
- Click the Configure Button and you will be directed to login to your Hubspot instance.
- Next, you will be asked to Map Welcome Fields to Hubspot Fields. If you are okay with the default field mapping configuration You can just click save.
- You can always update your Hubspot Authentication or field mappings by clicking Edit and selecting which settings you want to update from the dropdown.
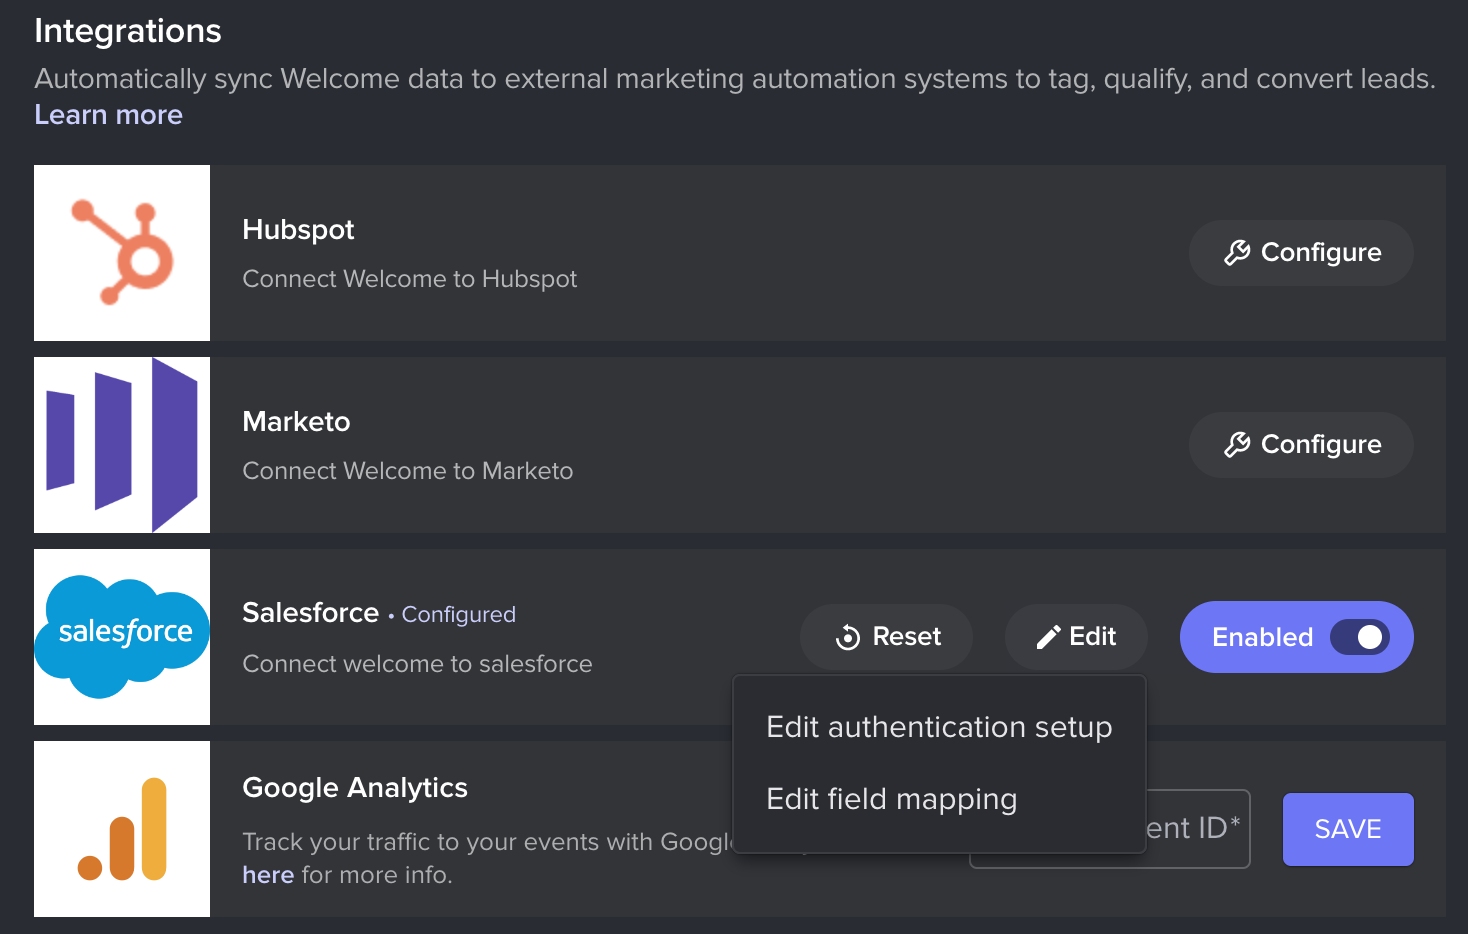
- You can remove the connection to Hubspot and your field mapping configuration by clicking Reset. This will not delete any data. You can always connect to Hubspot and set a new field mapping configuration again.

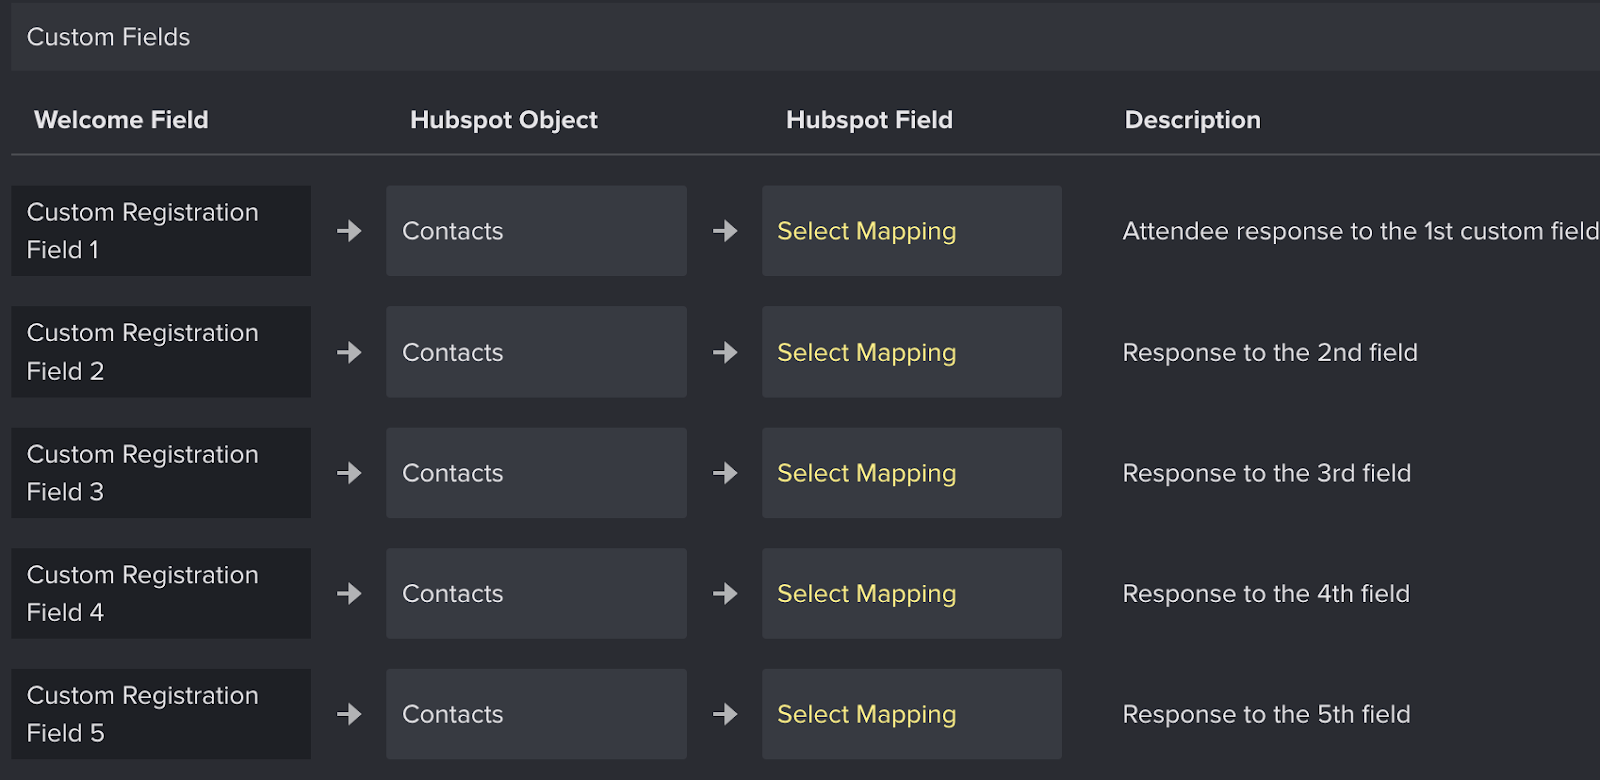
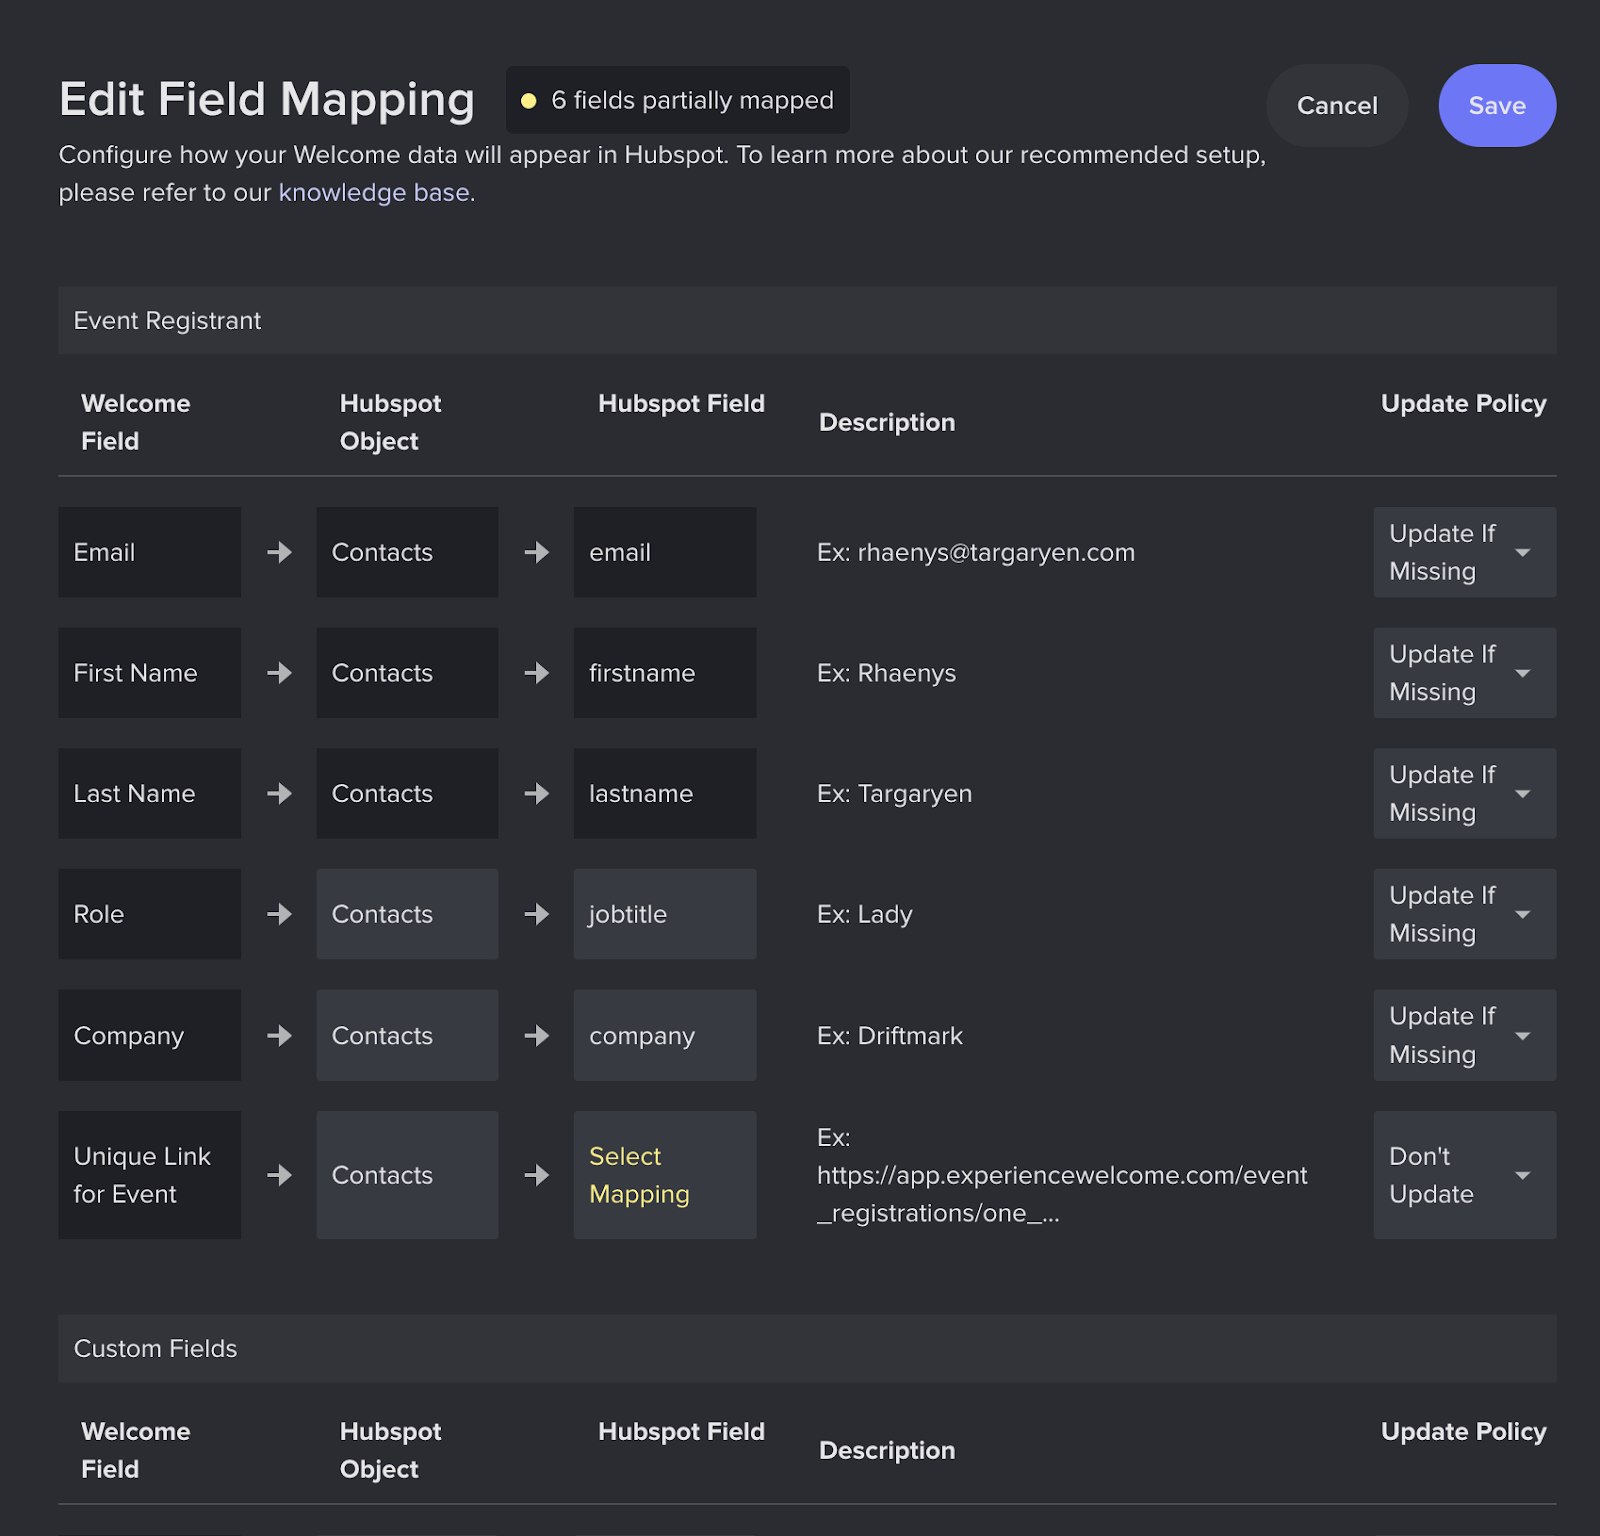
Setup – Mapping Welcome Fields to Hubspot Contact Fields

- The default field mapping provided works for the standard Hubspot instance so if you don’t need any specific field mapping you can click “Save” to finish configuring the Hubspot integration. You can always come back to the field mapping configuration later.
- All Welcome fields that will map to Hubspot Contacts are visible on this page. The integration will send other Welcome data to Hubspot in the form of timeline activities on Contact objects. (See the “What data gets synced and when” section below).
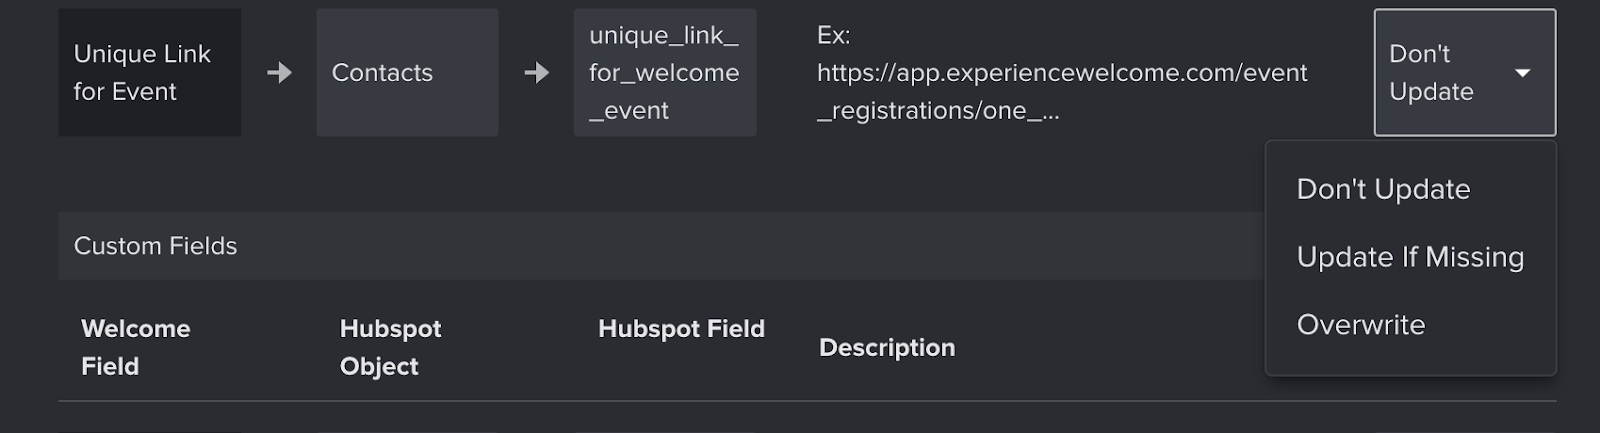
- Not all Field mappings are configurable by you. The destination of those mappings that you cannot update are in black boxes. The destination of those mappings that you can update are in grey boxes.
- When you click a mappable field to update you will be taken to a page to search for the field in Hubspot that you can map to. If you need to create a new field in Hubspot, first, create the field, then click “Select Mapping” in the Welcome Field Mapping Table.

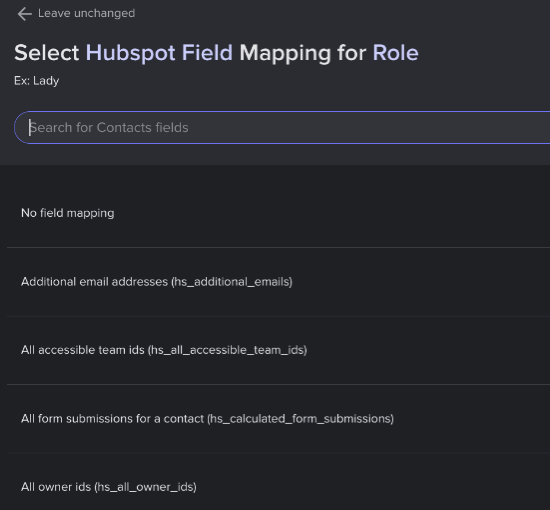
- You must also select the Update Policy for a field. You can choose from: “Overwrite”, “Update If Missing”, and “Don’t Update”.
- Custom Registration Fields:

- You can map up to 5 attendee custom field inputs on an event registration page.
- For example, if the custom field is "City", the integration will sync the attendee's answer: "New York"
- The custom fields are mapped in order
- Mapping custom fields is optional.
- You should come back to the field mapping page to update the mapping configuration for different events which have different custom fields
What Welcome data gets synced to Hubspot
Part 1: Contact Timeline Events
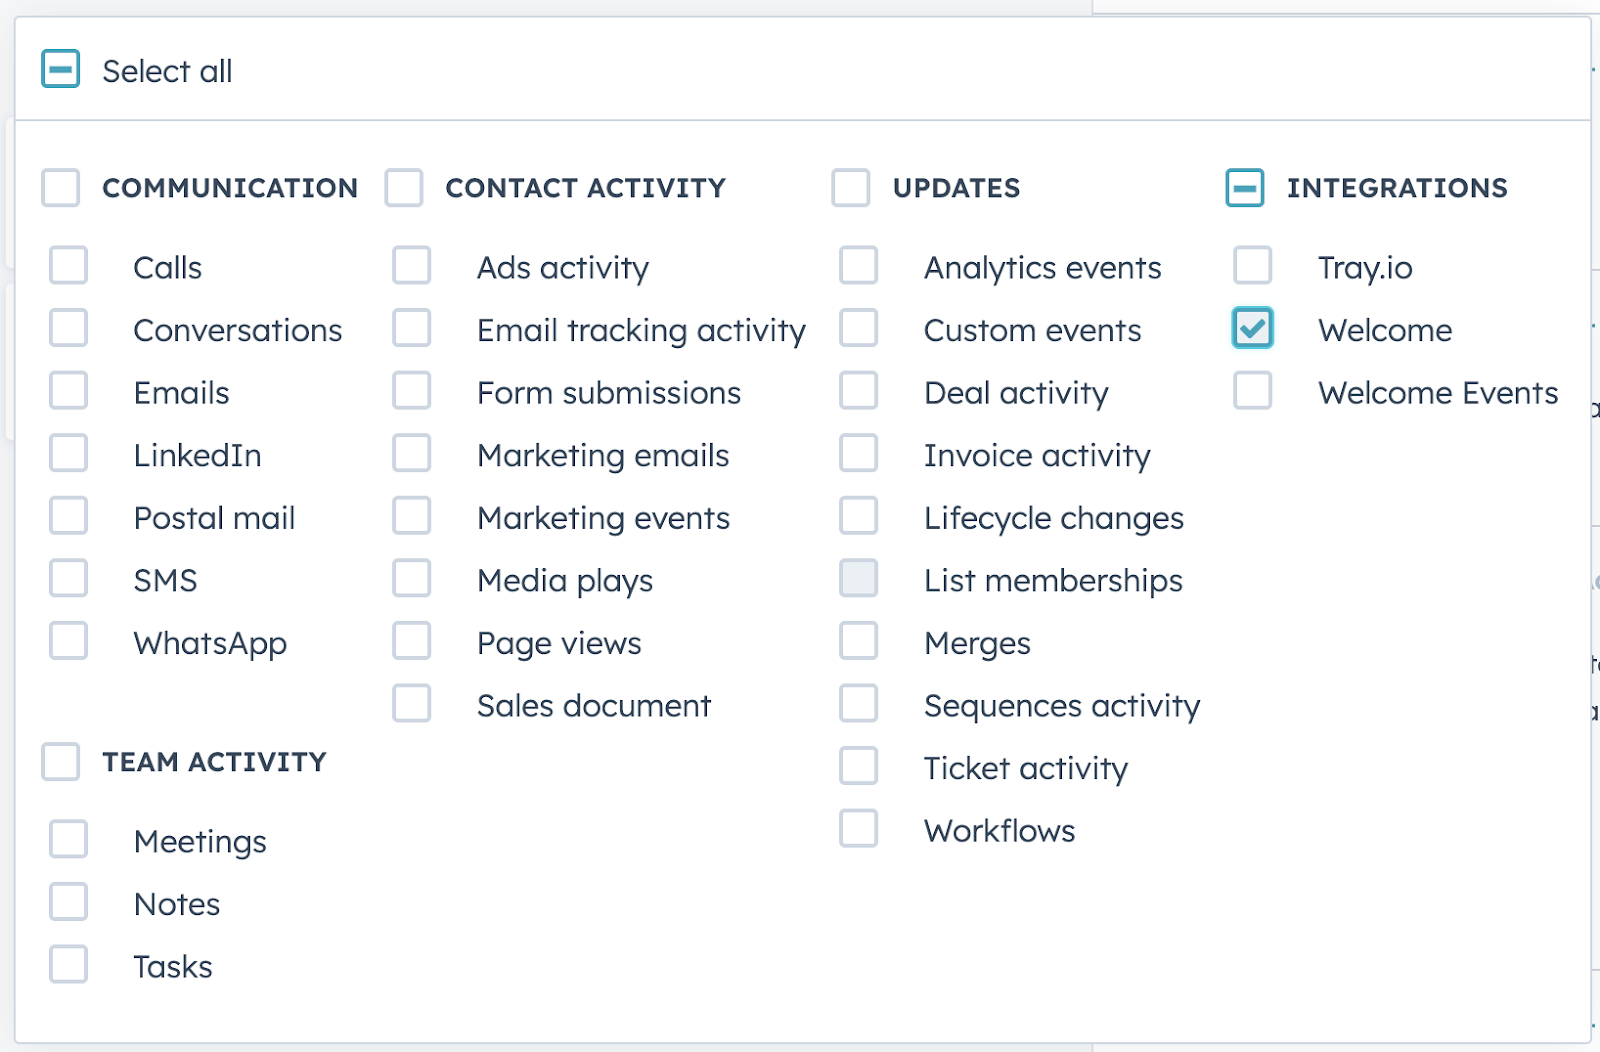
The majority of information sent to Hubspot by this integration is in the form of Timeline Events on individual contacts. In order to view how a contact interacts with a Welcome Event, you need to add “Welcome” to your Activity Filter for Contacts.
Note: Our old integration had “Welcome Events” which is now deprecated.
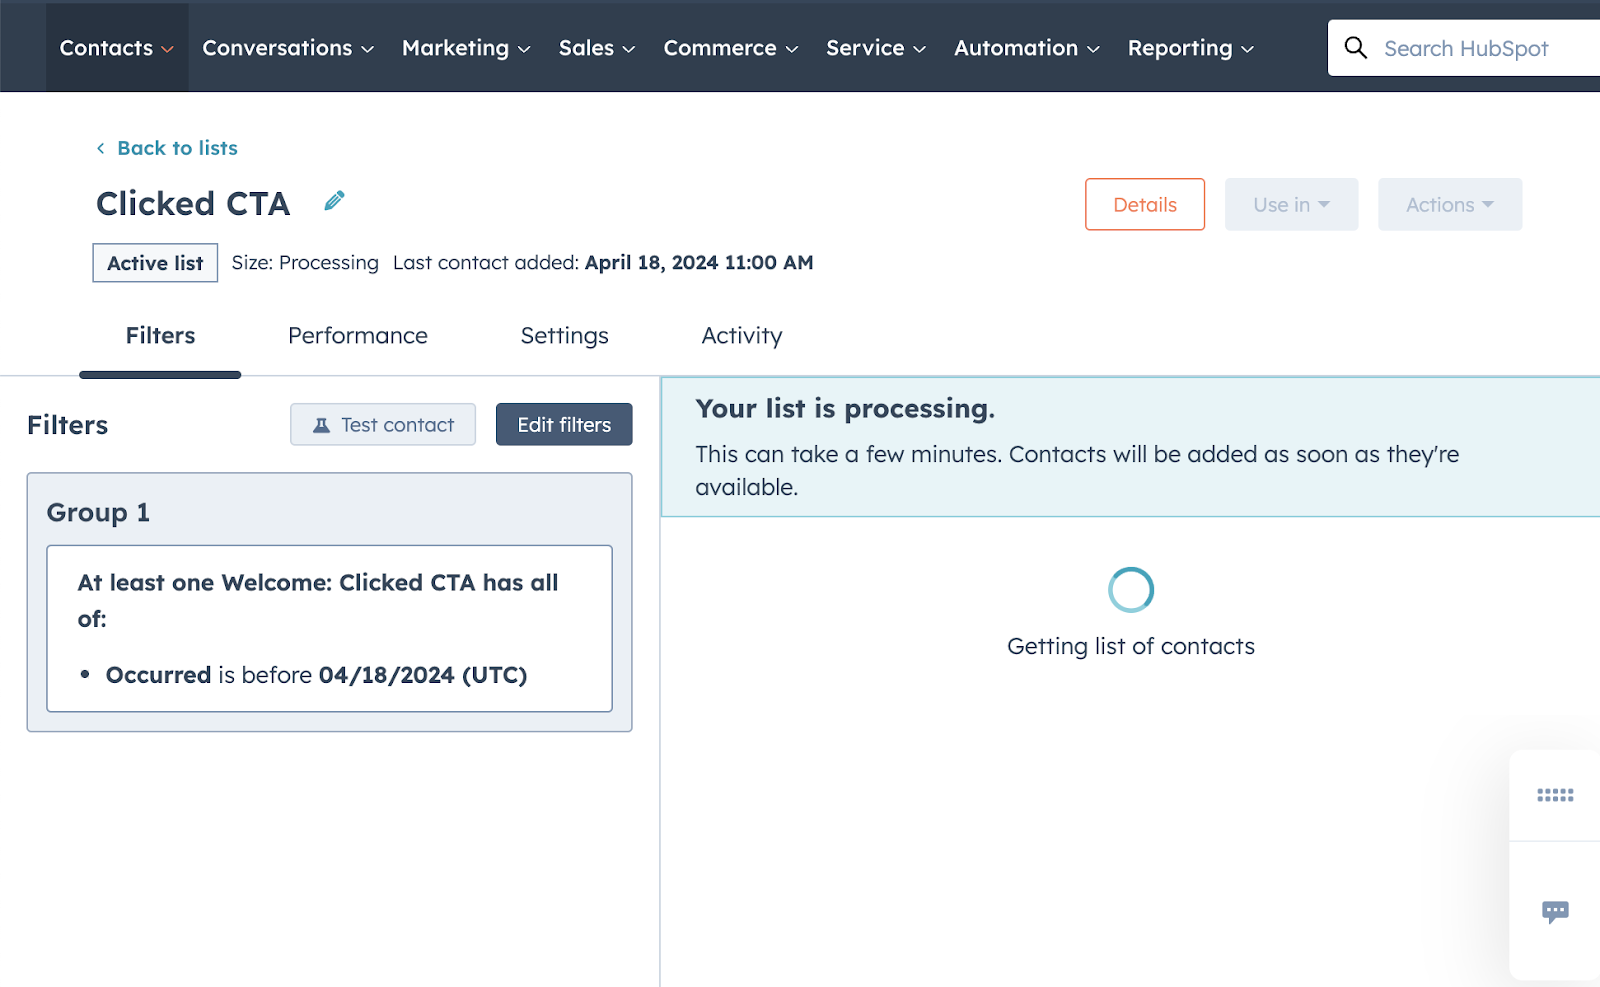
Timeline events can be used to filter Contact lists
Timeline Events can be used to trigger workflows
Timeline events can be used to score leads

Contact Timeline Events sent by this Integration
Activity
When is the activity sent to Hubspot
Attendee Registered for the Webinar
Real Time
Attendee Responded to a Poll
Real Time
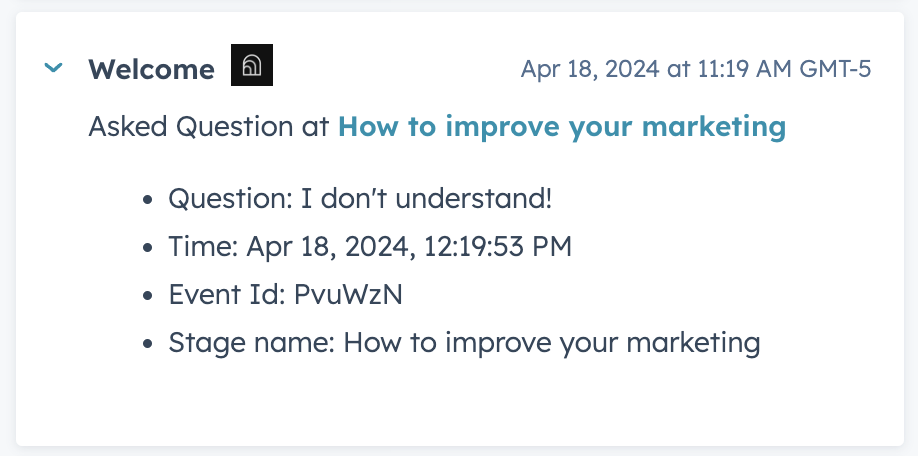
Attendee Asked Question
Real Time
Attendee Clicked CTA on Stage
Real Time
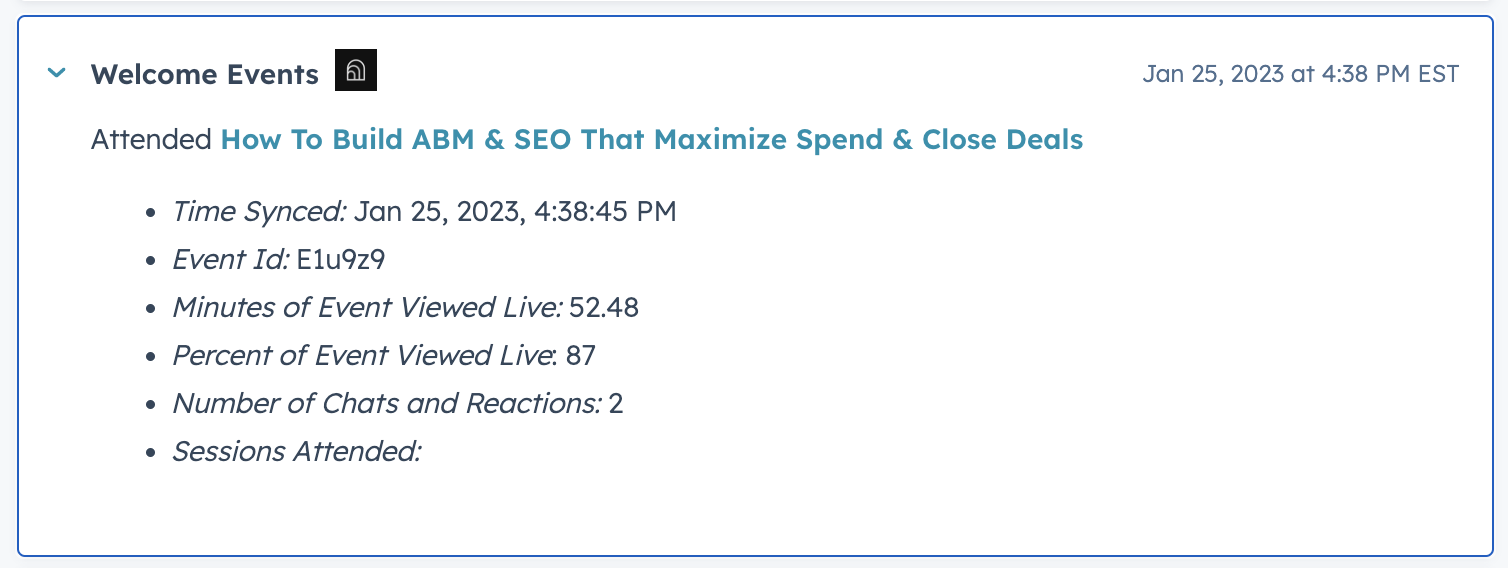
Attendee Attended Webinar Live
90 mins after event ends*
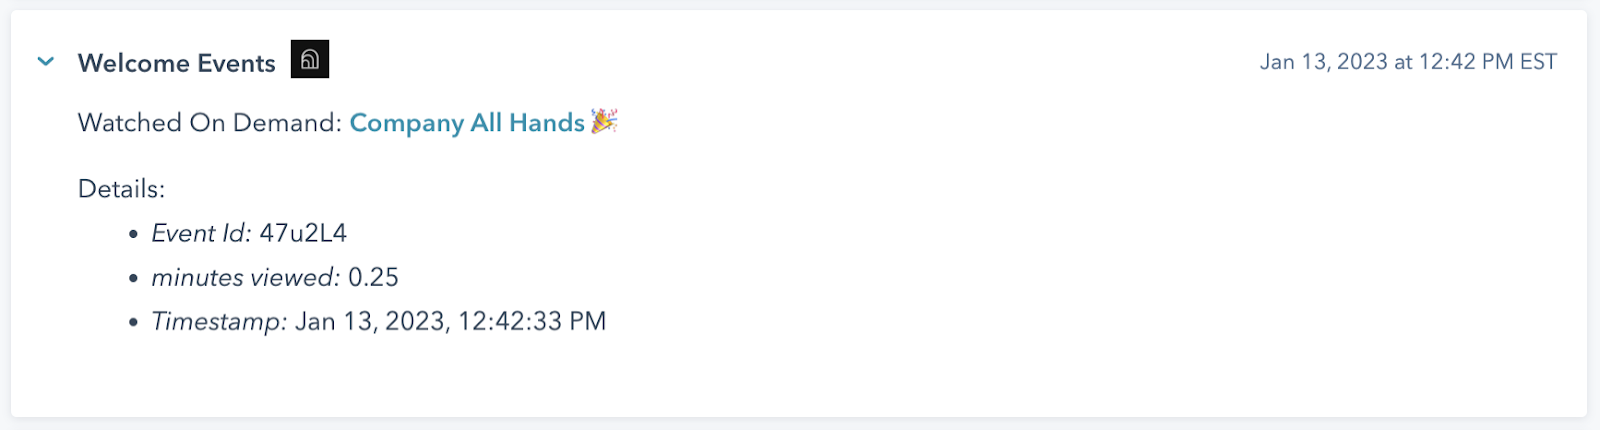
Attendee Viewed Webinar On Demand
90 mins after the duration of the content they viewed*
UTM Source
Real Time
UTM Term
Real Time
UTM Medium
Real Time
UTM Campaign
Real Time
UTM Content
Real Time
* These events include analytics data like, in the case of live attendance, the number of chat messages the attendee sends. The transmission of this data to Hubspot does not happen in real time because it needs to be aggregated and processed on Welcome’s servers first.
* Activities also are sent to Hubspot per attendee and are not updated in batches.
Examples of Timeline Events
Attendee Registered for the Webinar

Attendee Responded to a Poll

Attendee Asked Question
Attendee Clicked CTA on Stage

Attendee Attended Webinar Live
(Note: You must have session durations enabled in your event to see which sessions an attendee viewed.)
Attendee Viewed Webinar On Demand
Part 2: Marketing Events
- When someone registers for a Welcome Event, this integration will find or create a Hubspot Marketing Event and subscribe the registering contact to that Marketing Event as “Registered” in real time
- When someone attends the event, this integration will subscribe the contact to the Marketing Event as “Attended” in real time
- Marketing Event subscriptions can be used to create lists in Hubspot

Part 3: Contact Properties
When someone registers for your Welcome event, this integration will update their Hubspot Contact with the properties you have configured in the field mapper during integration set up. The update will occur in real time and will respect the Update Policy of the individual fields you have set in the field mapper.
How do I send registrants into Welcome from Hubspot
To send Contacts into Welcome such that they don’t need to register again, we recommend using our Quick Registration link functionality . This will use Hubspot as the system of record for all registrations, and Welcome as the system of record for all attendance data.
Alternatively, you can create a Hubspot workflow to send registrants into Welcome, populate a Unique Link Property on each registrant’s Contact Object, and use that property in your pre-event communications. Note that this is a bit more involved and complicated, but if you want to have Welcome be perfectly synchronized with your Hubspot registration data, this is the only way to do that automatically.
- Navigate to your Organization Integration settings.
- Click Edit Field Mapping
- Ensure that you have selected a mapping for a registrants’ Unique Links.

- Otherwise, create a Contact property in Hubspot for the Unique Link and select that property in the field mapper

- Navigate back to your integrations settings and Copy the webhook url listed
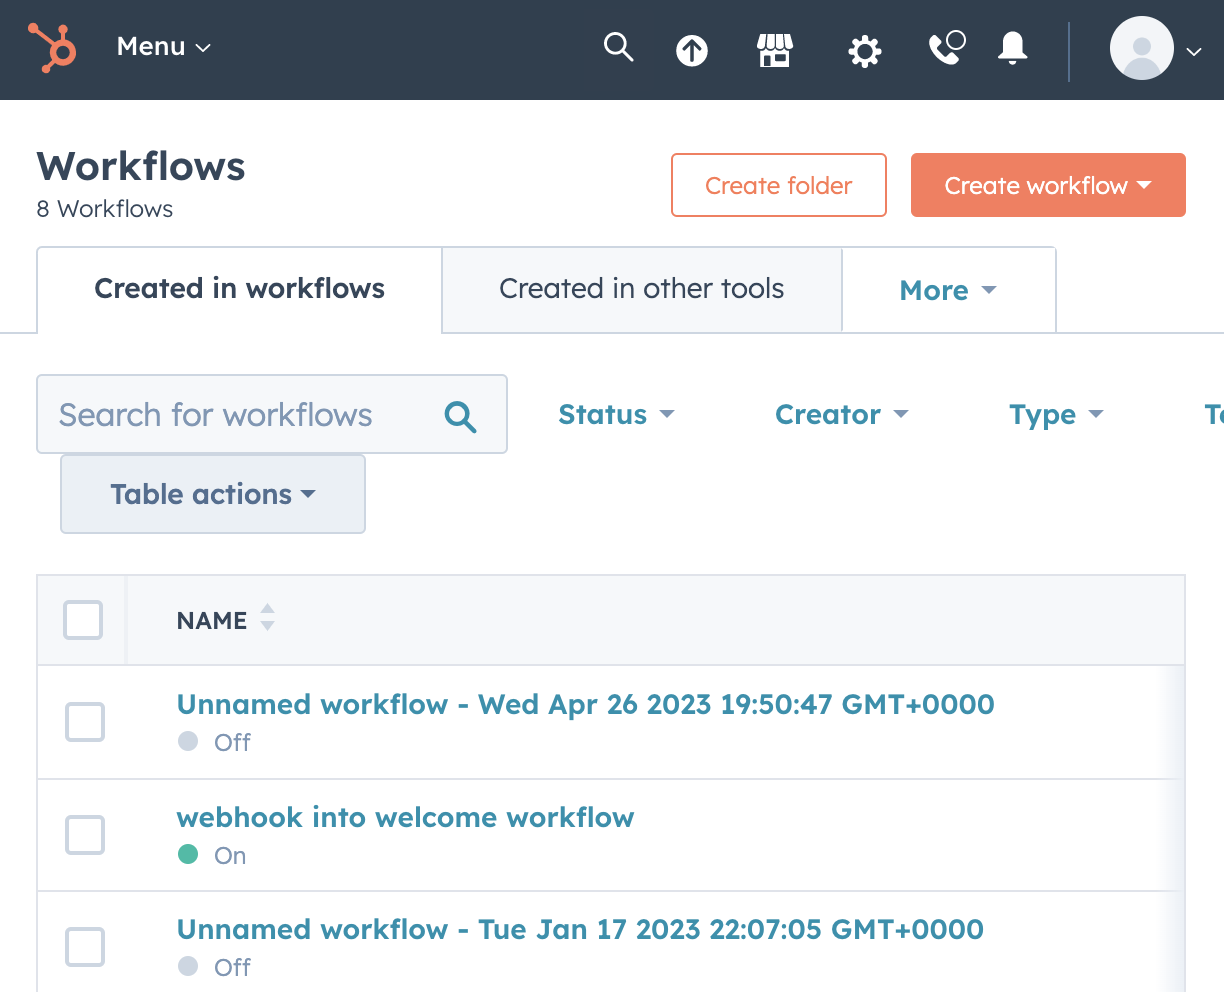
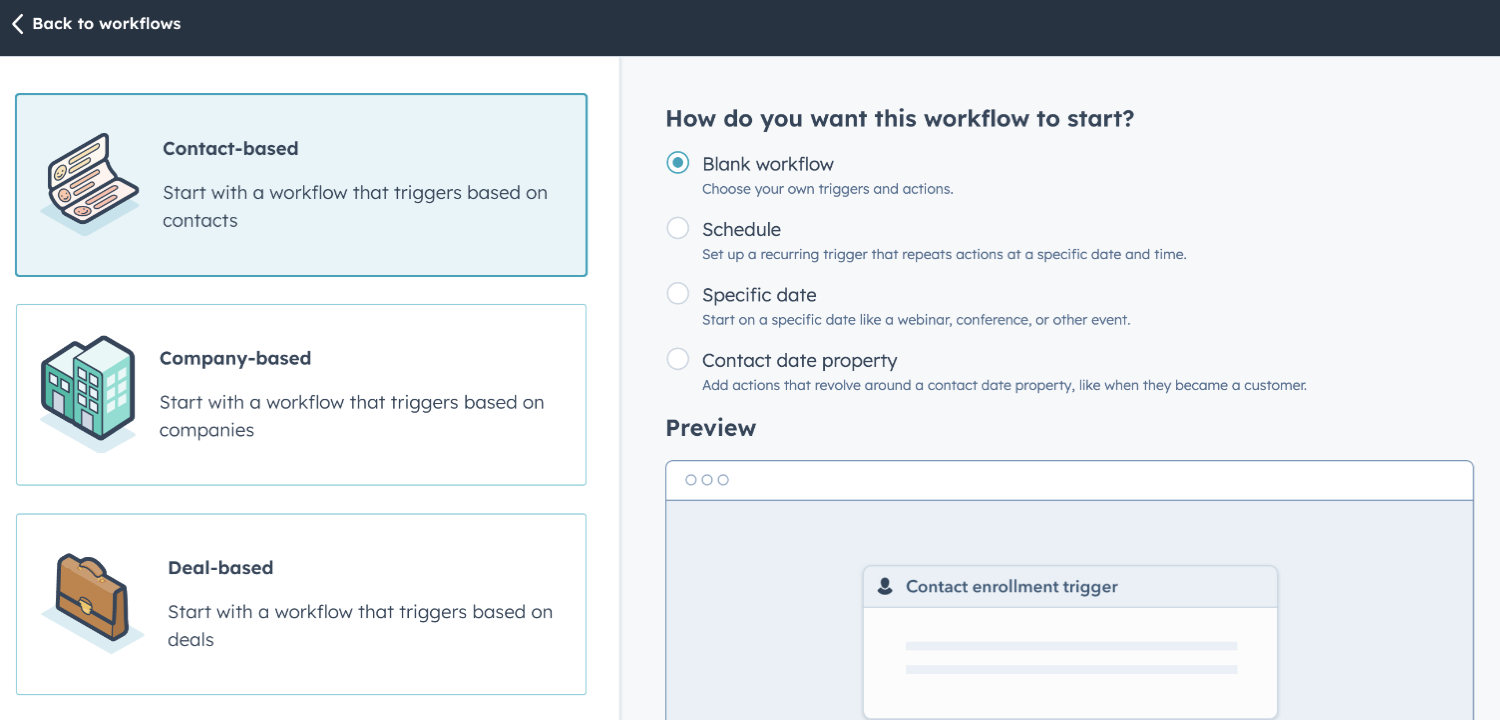
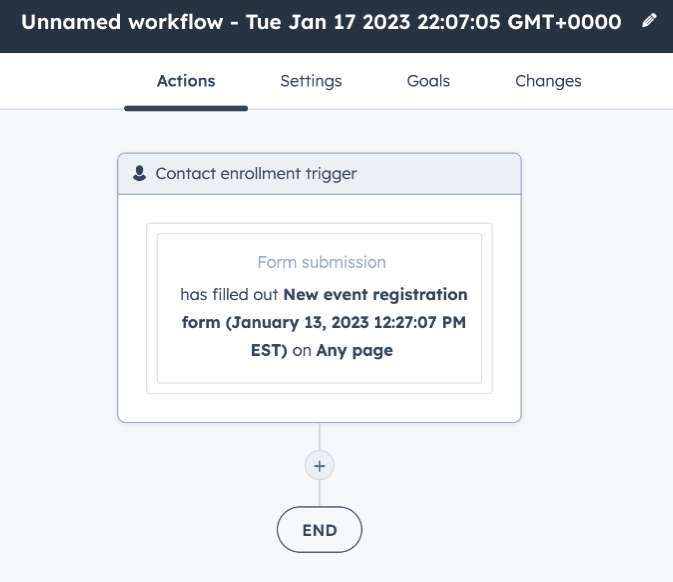
- In Hubspot create a contact based Workflow with your event’s Hubspot registration form as the trigger.
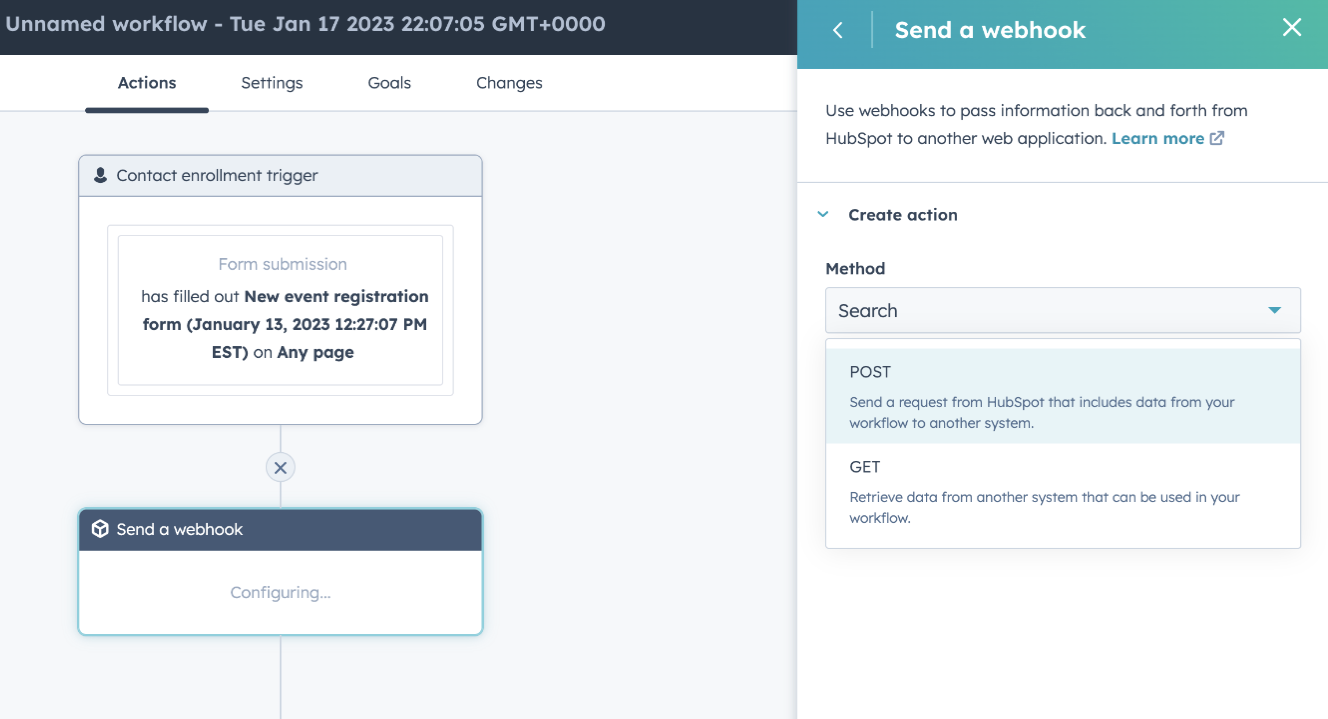
- Add a step to Send a Webhook
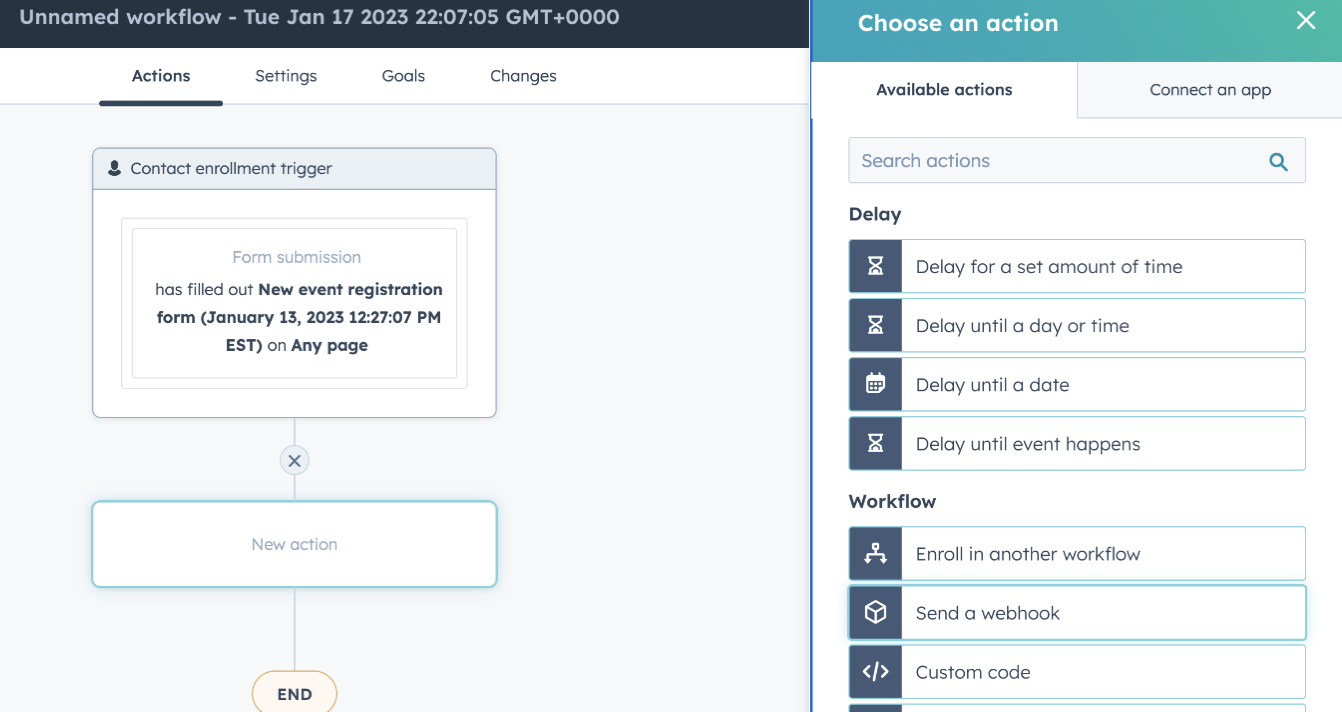
- Choose the POST Webhook option
- Paste the URL you copied from the Welcome Event Dashboard into the Webhook URL field
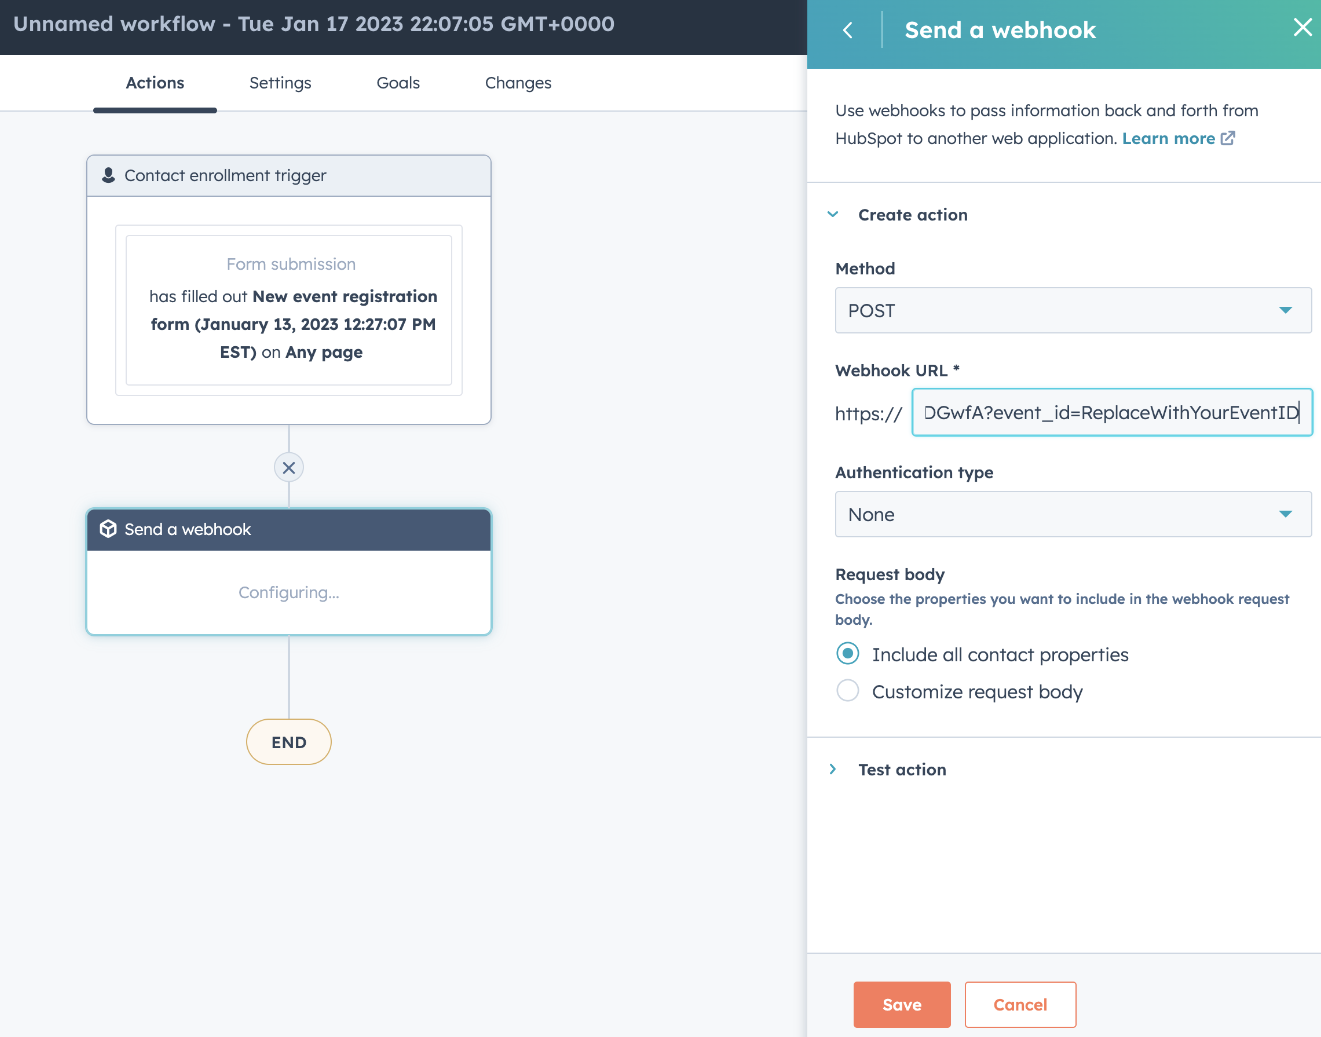
- Navigate to the Welcome event that you want to send registrants to and copy the Event ID of that event. (It’s the 6 characters in the event link after app.experiencewelcome.com/events/)
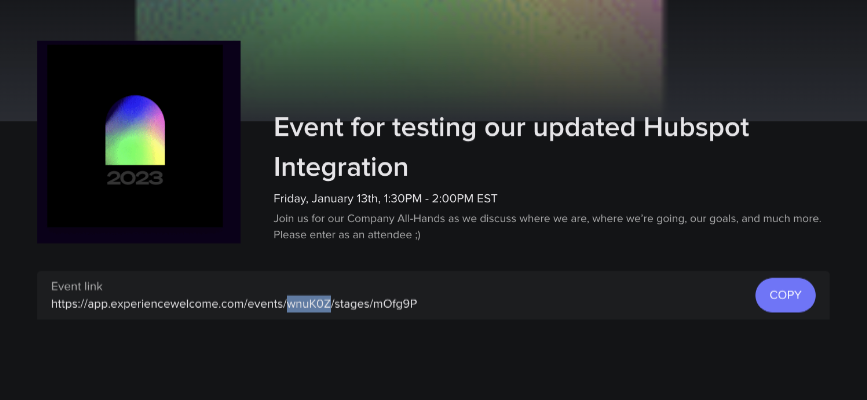
- Replace the “ReplaceWithYourYourEventId” String in the Webhook URL with the actual Welcome event ID. In this case “wnuK0Z”
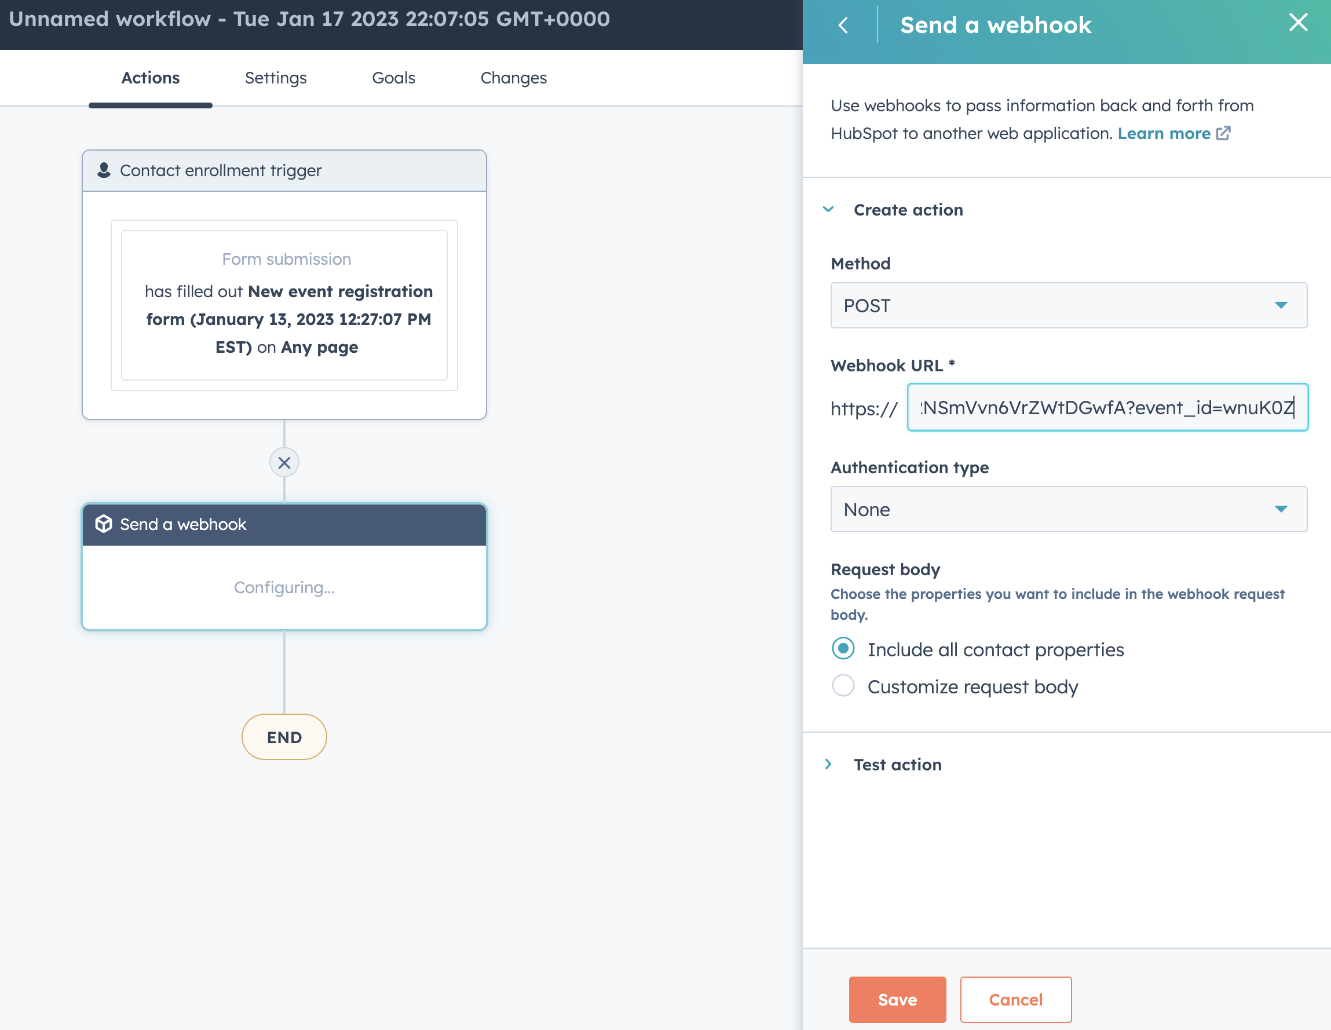
- Click Save and Publish your workflow
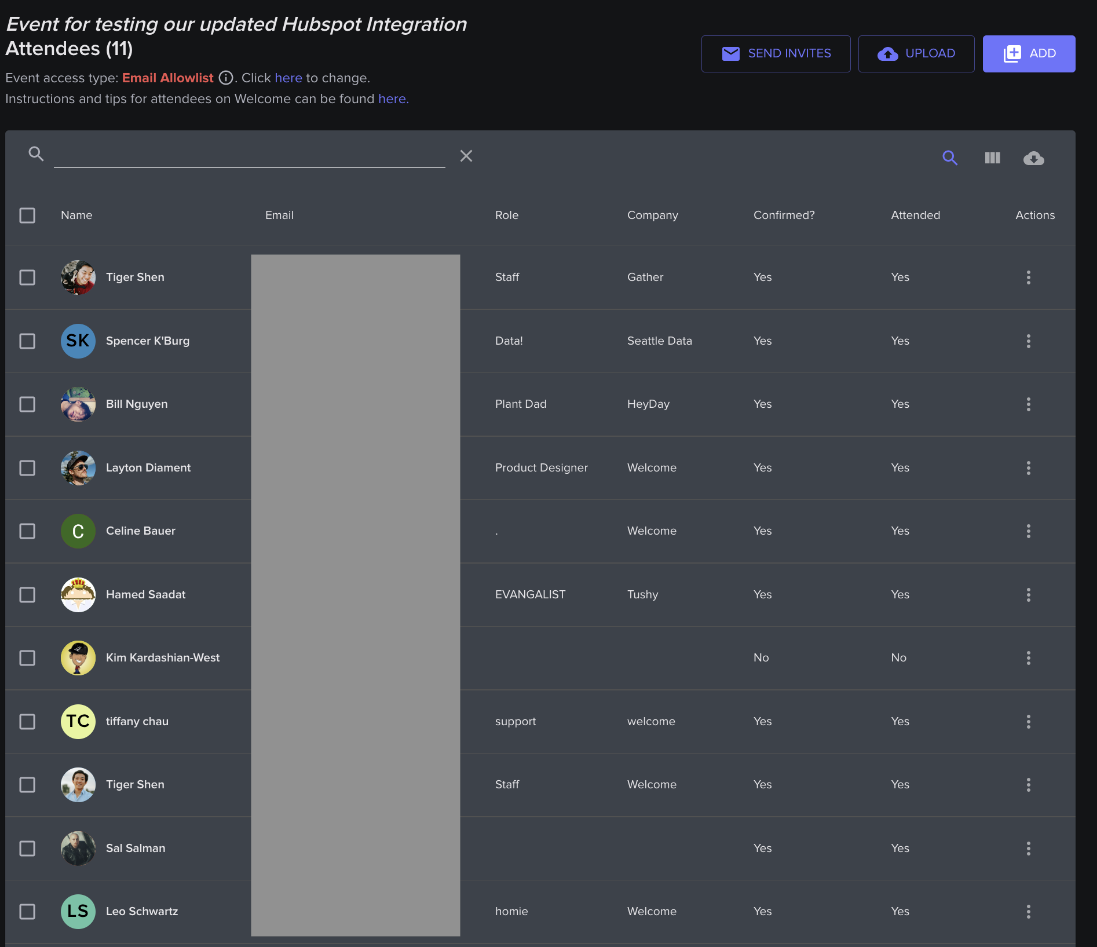
- Now when someone fills out your Hubspot registration form they will appear in the attendees list of your Welcome event
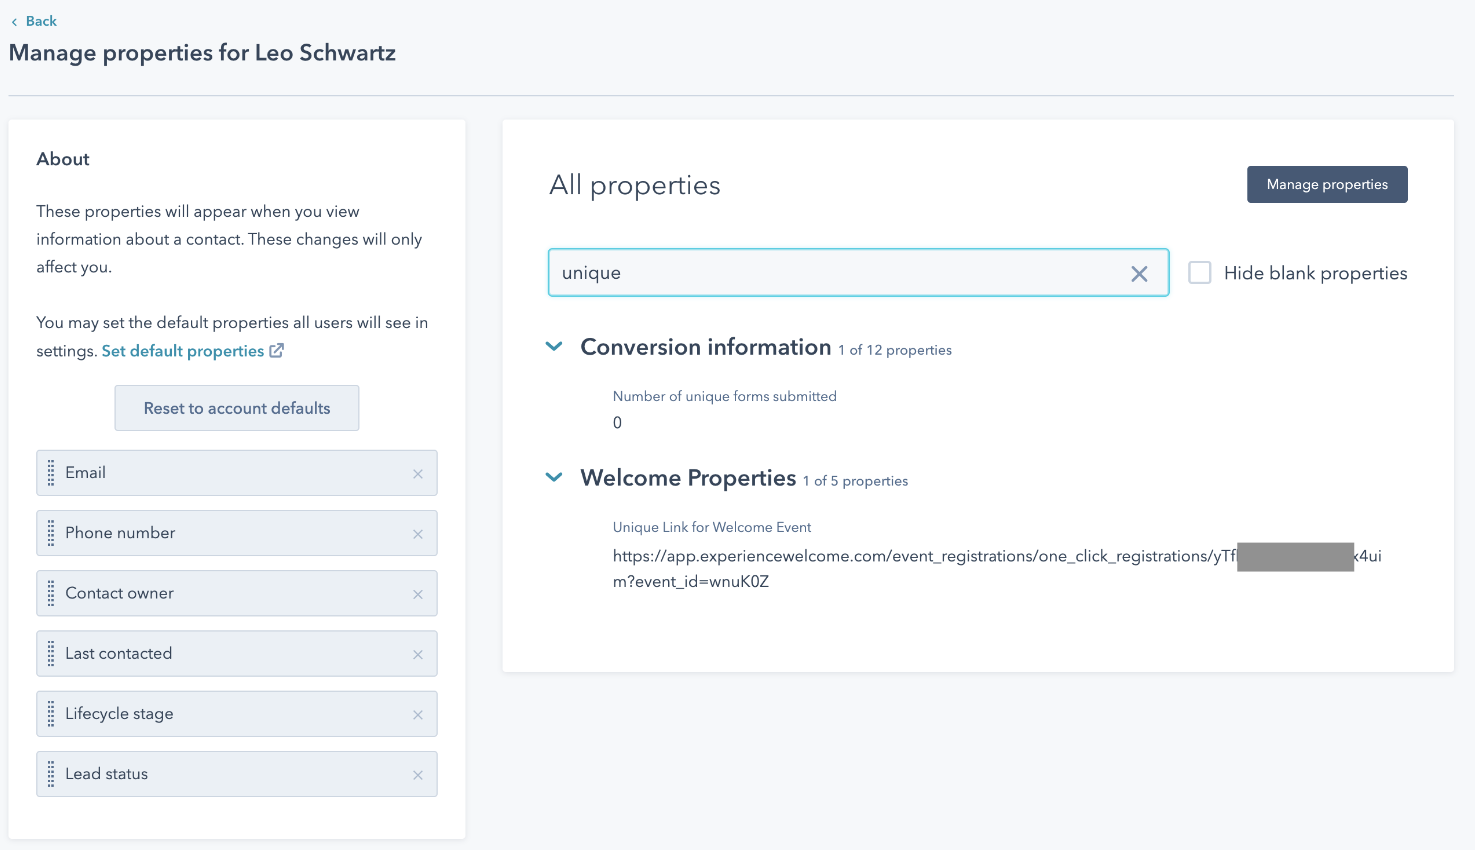
- Their Contact object will also contain their unique link to get into the Welcome event. This link will be stored in the Contact property you set for the Attendee’s Unique Link in the Field Mapping Configuration step above.
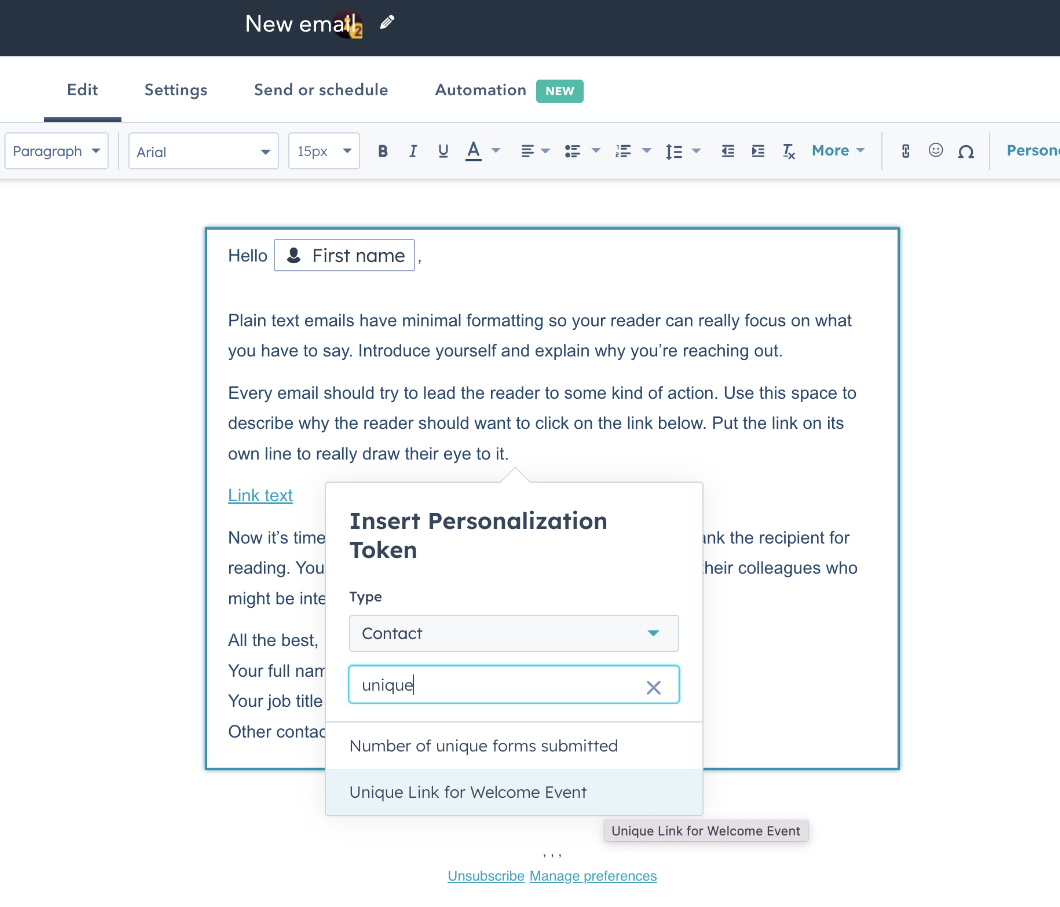
- You can use the Unique Link Property in your Hubspot emails as a personalization token.
Contact us
If you need any assistance or you have any questions regarding your Welcome <> Hubspot integration, please email support@experiencewelcome.com
Hubspot Integration Examples
Here you will find an example of setting up and using a Welcome <> Hubspot Integration.
Setting up a Hubspot Integration within Welcome: https://www.loom.com/share/db93d019f09e40008f8439204a3c06b6
Real-time registrations in Welcome being sent to Hubspot: https://www.loom.com/share/c616fc6ff6984d5881ece4b74ef2a578
How to see registered vs attended in Hubspot https://www.loom.com/share/50ab74719c5346c5824fe13e4877675e
Creating a hubspot list that shows all attendees which clicked on a CTA for a particular event: https://www.loom.com/share/d8a46cce905e4127b32c52e2cb6bf4a2
Trending Posts
Welcome's Next Evolution: Webinars and Content at ScaleABM and Demand Generation: A match made in heaven?The Ultimate Guide on How to Integrate Organic and Paid Marketing Strategies
Stand Out By Staying In: 5 Ways To Use Brand Marketing Right Now
8 Creative Ways to Repurpose Your Webinar Content
Growth Marketing vs Demand Generation
How to Drive Qualified Pipeline and Enable Sales After Your Webinar Wraps
Loved and Trusted


