
Join 5000+ marketers that receive The Drip newsletter covering the most relevant topics in B2B marketing.
Quick Registration Guide
If you are using a 3rd party marketing platform to manage registrations, you can use Quick Registration Link to make Welcome's registration process completely seamless. When an attendee clicks a Quick Registration Link, their information will be automatically uploaded to Welcome so that they don't have to register twice – once on your marketing platform of choice, and once with us.
Note: For security reasons, Quick Registration Links will not work when email verification is required for your event. To learn more about email verification, please visit our Event Registration Settings Guide.
Below is a demo of the normal registration flow without using quick registration.
Now, let's watch and see how much easier it is for an attendee to join an event with Quick Registration.
How to Edit your Quick Registration Link
Each Quick Registration Link contains dynamic fields that that must be filled in by the marketing platform you are using. Let's break down the links and give you some examples of the commonly used platforms.
https://app.experiencewelcome.com/events/EventID/quick_reg?email={email}&firstName={firstName}&lastName={lastName}
We have highlighted the dynamic fields of this Quick Registration Link, which will be different for each attendee, in red. Your marketing platform will need to auto-fill in these dynamic fields for you when you send emails to your attendees.
Note: be sure to use your platform's hyperlink functions and not simply copy and paste. In some cases you may need to manually enter them by editing the link.
Let's go over how to implement this on some popular marketing platforms. This will not be an exhaustive list, and you should always confirm and test these links before sending them out.
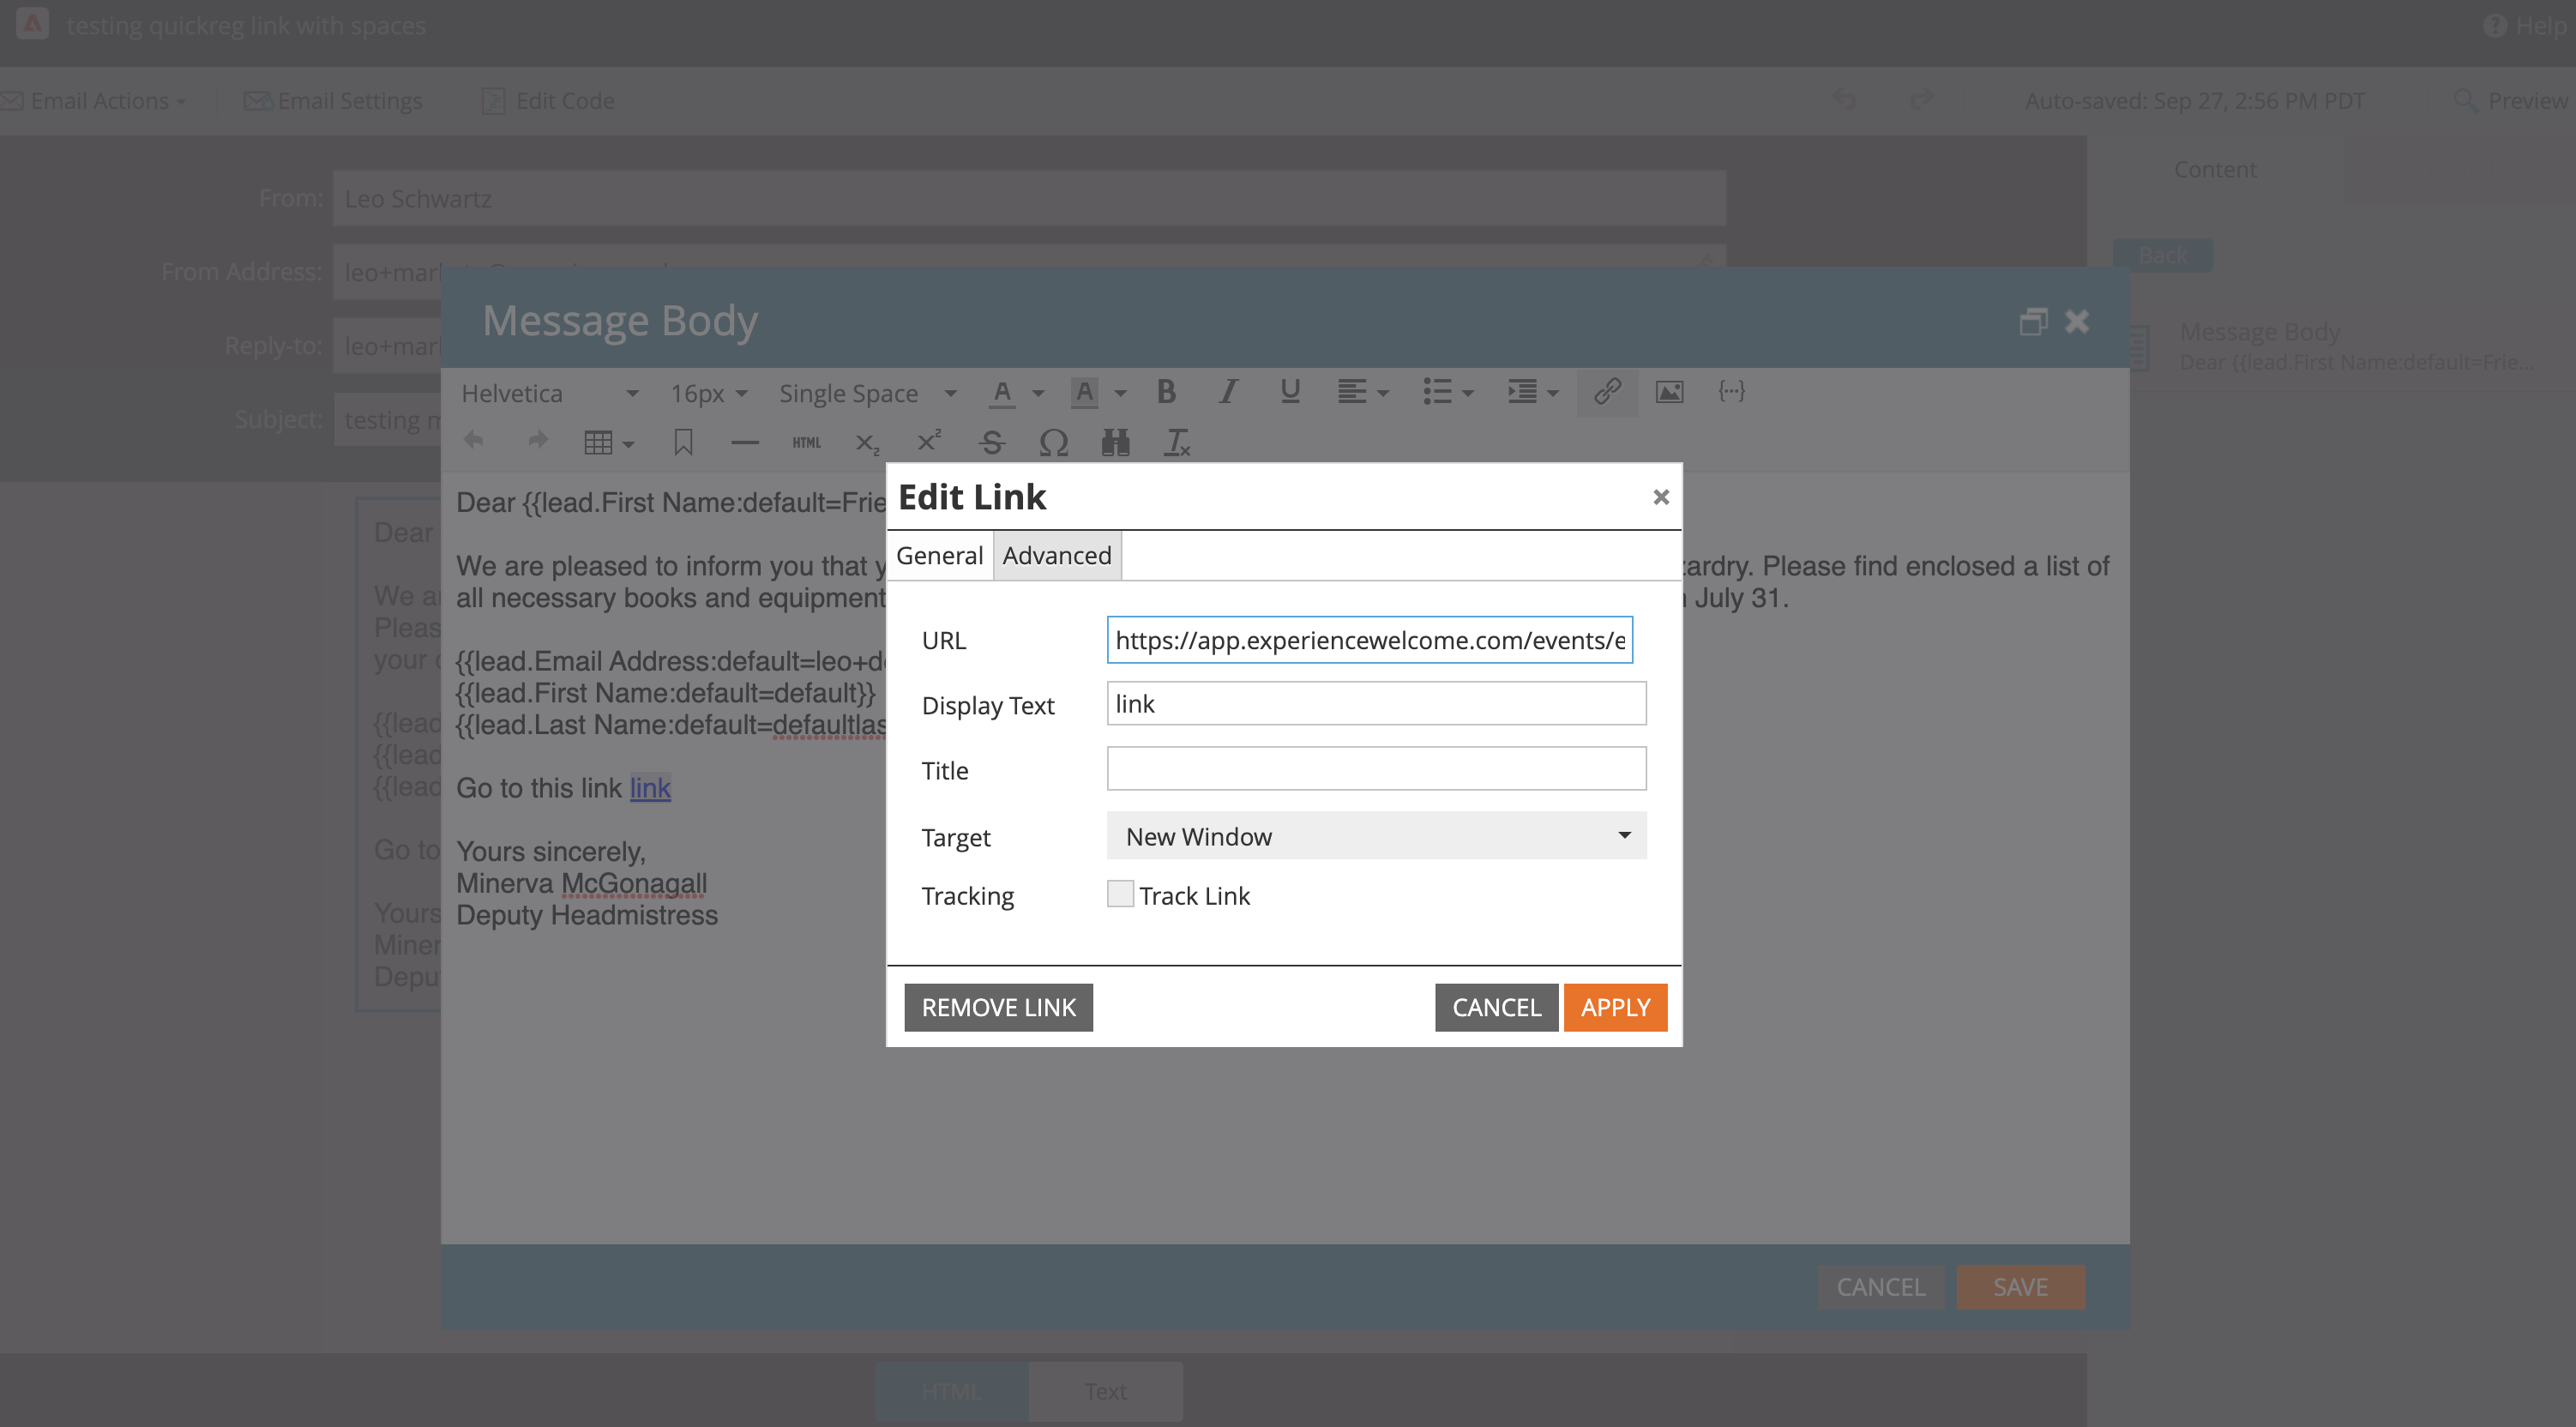
Marketo
Marketo calls these dynamic fields Tokens. Be sure to include them in the link settings.
{{lead.Email Address}}
{{lead.First Name}}
{{lead.Last Name}}
EXAMPLE: https://app.experiencewelcome.com/events/EventID/quick_reg?email={{lead.Email Address}}&firstName={{lead.First Name}}&lastName={{lead.Last Name}}
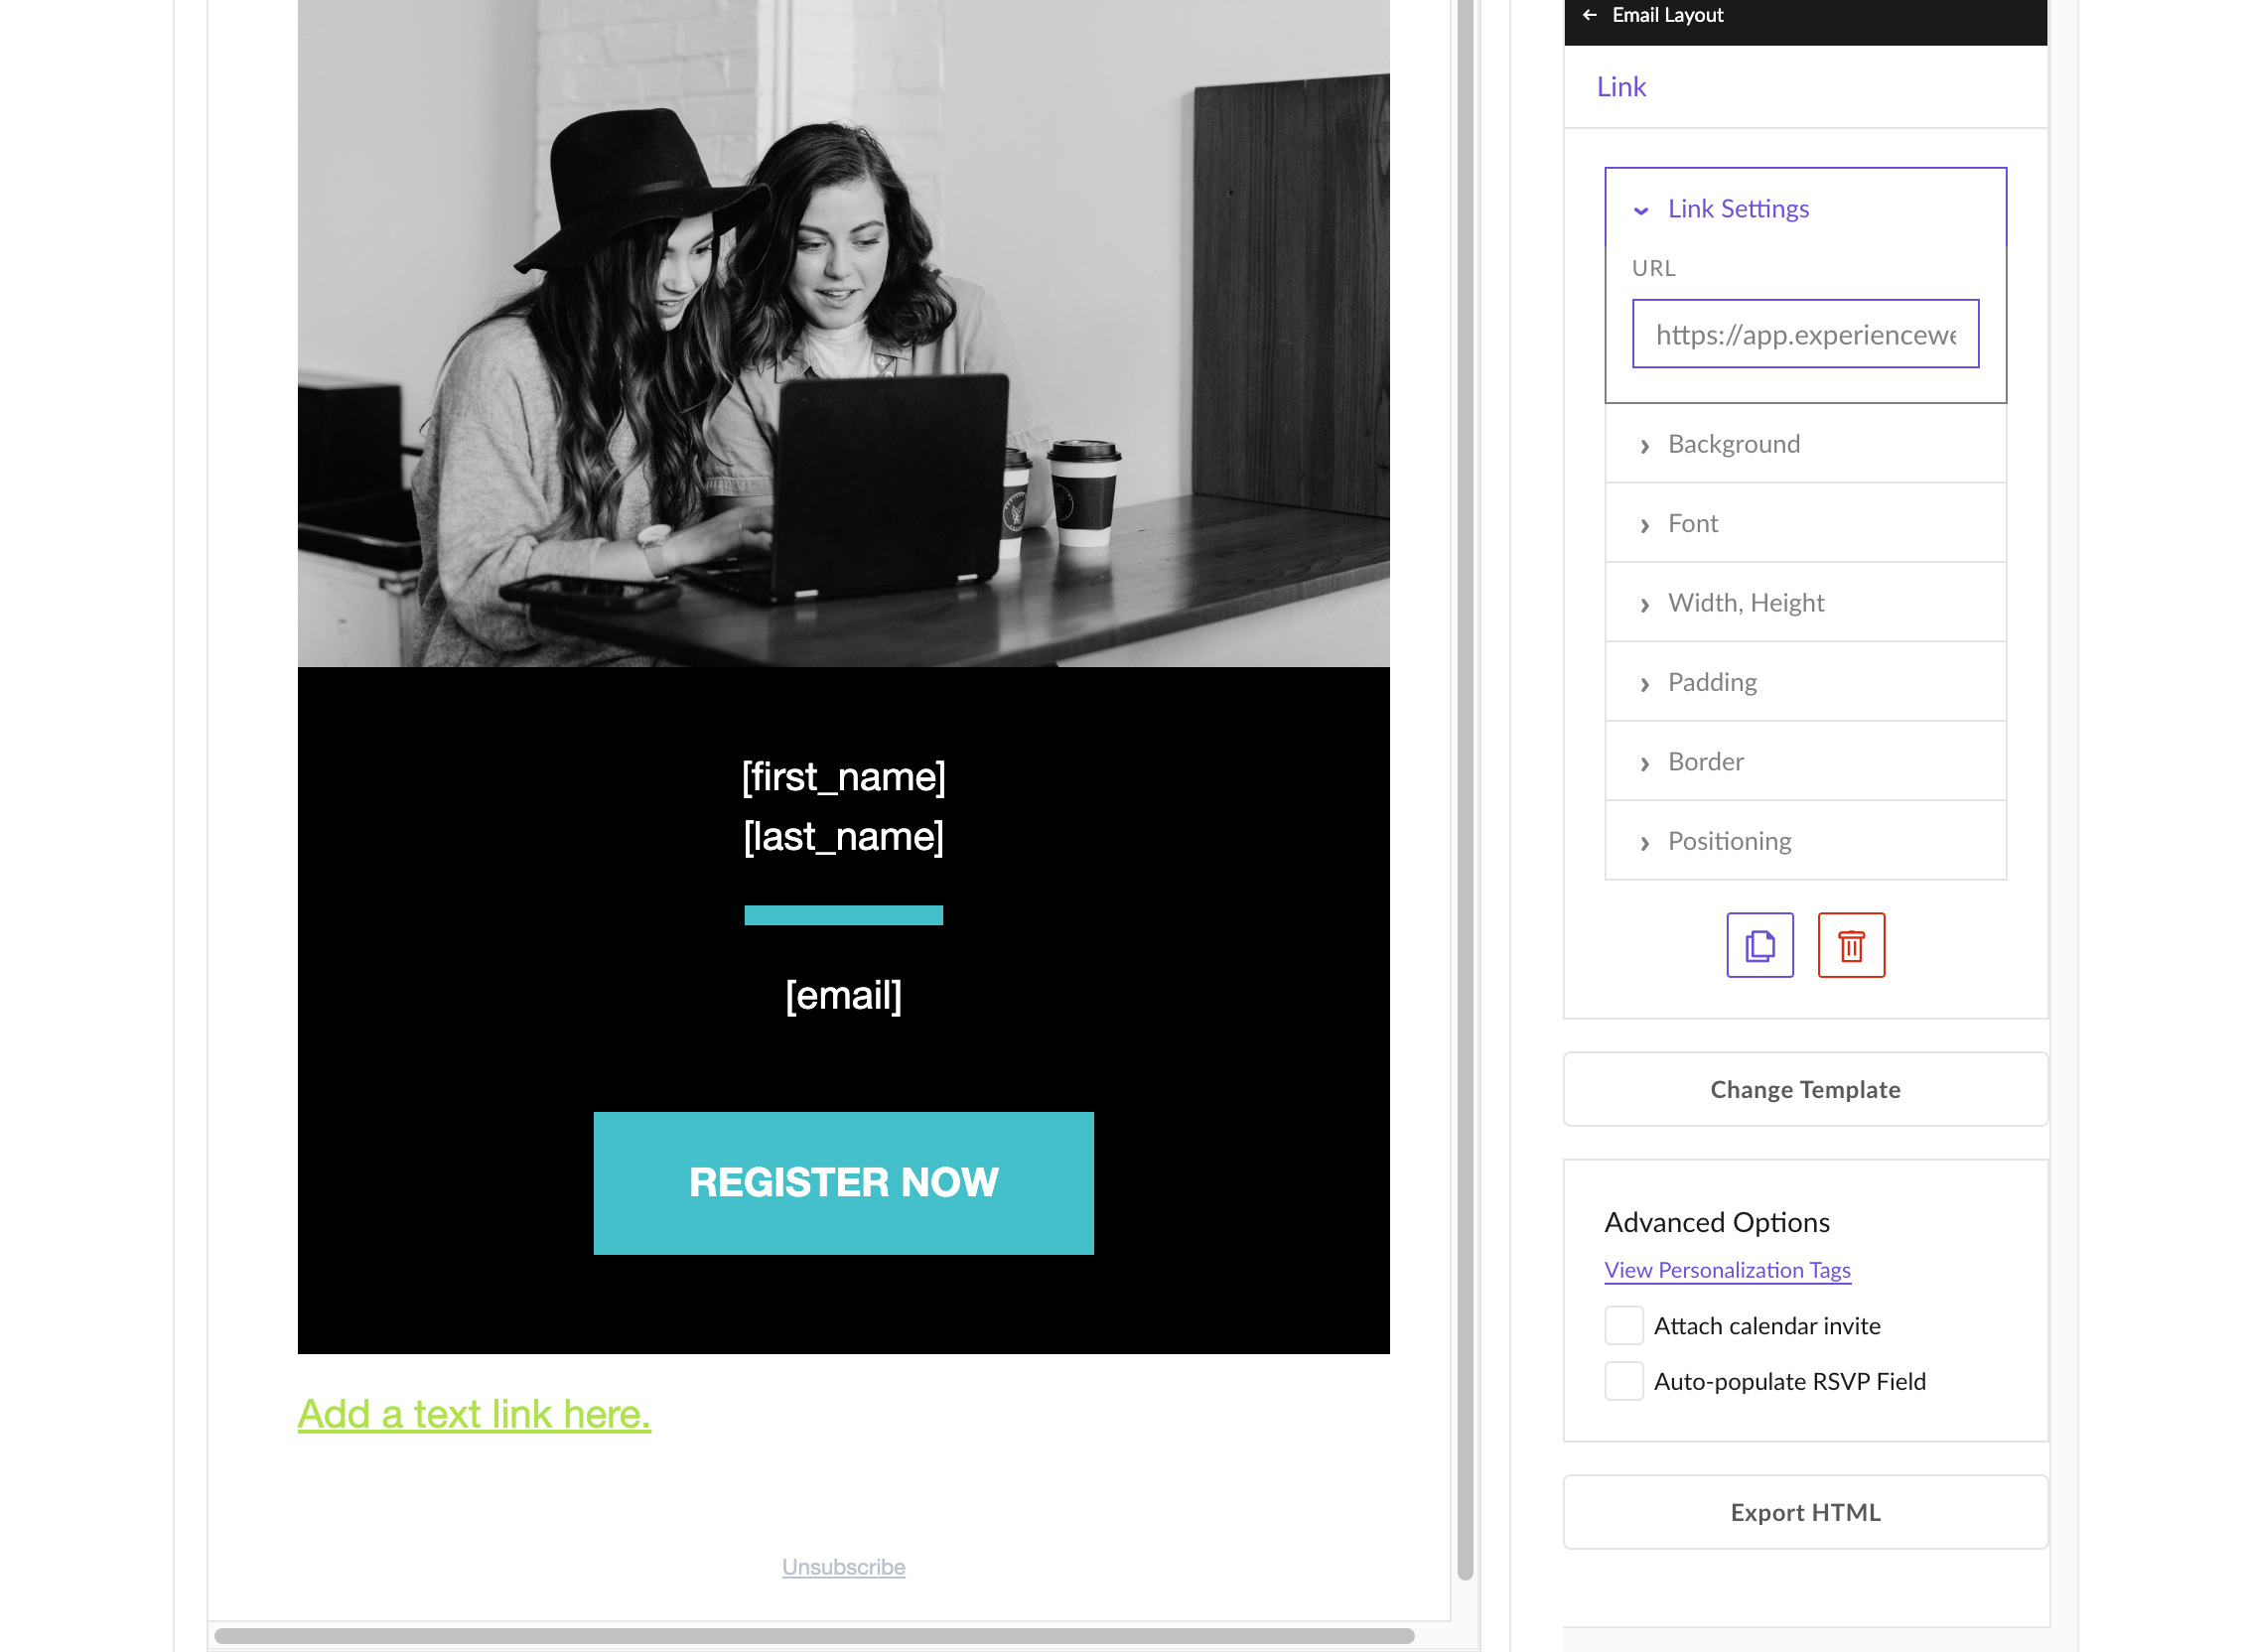
Splash
Splash calls them Personalization Tags. Be sure to include them in the link settings.
[email]
[first_name]
[last_name}
EXAMPLE: https://app.experiencewelcome.com/events/EventID/quick_reg?email=[email]&firstName=[first_name]&lastName=[last_name]
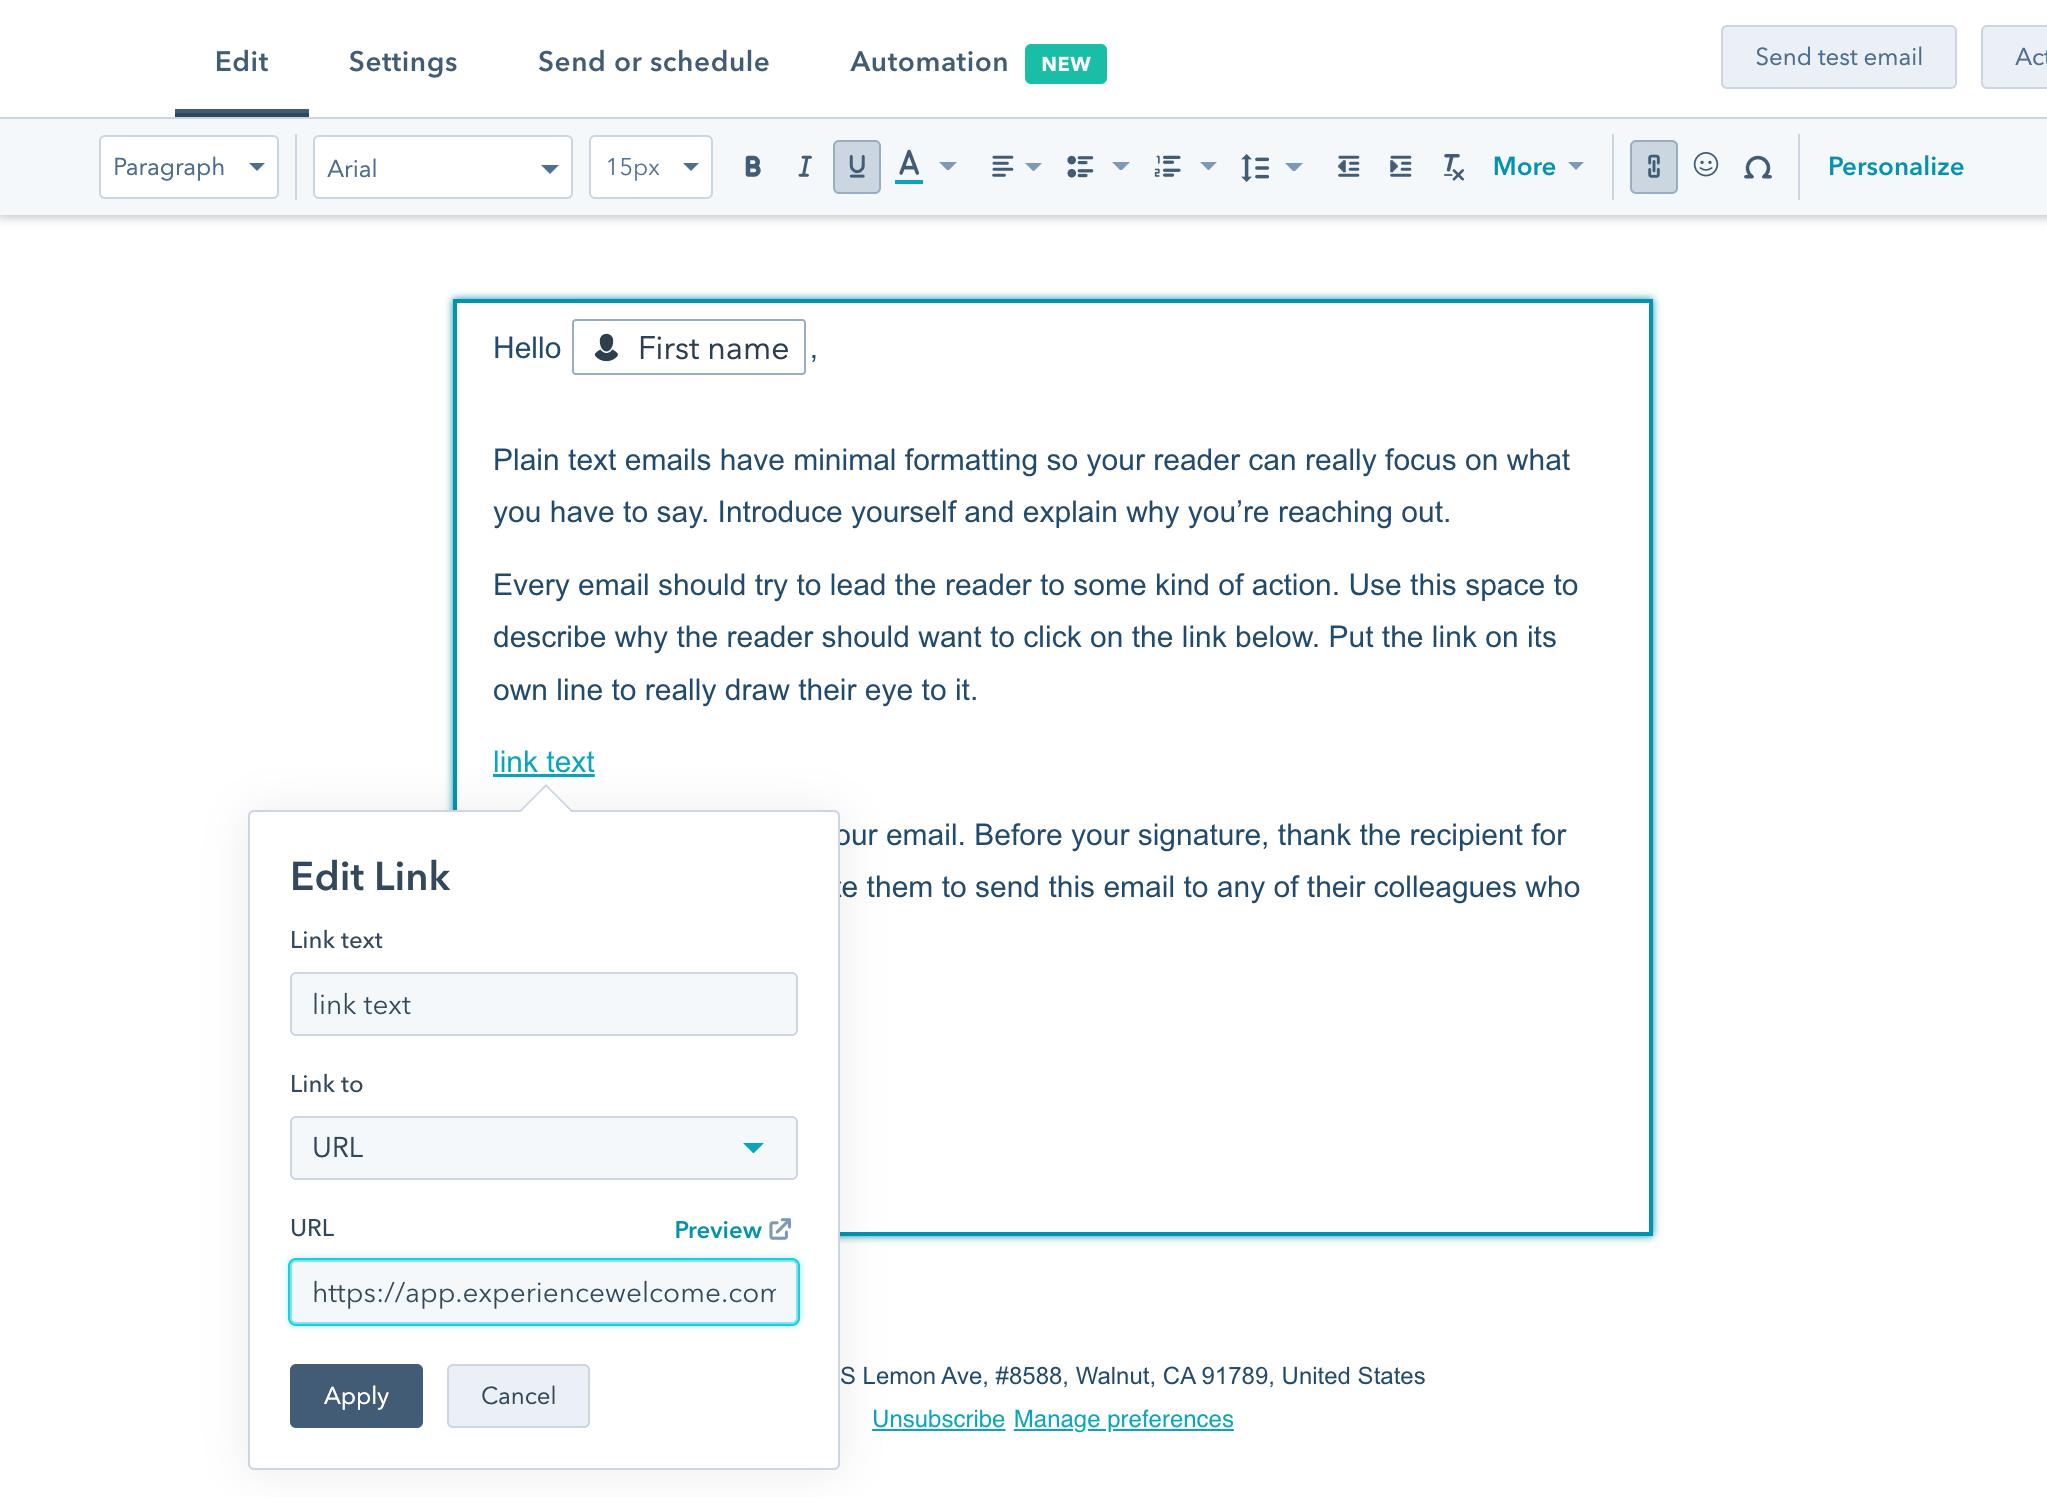
Hubspot
Hubspot uses Personalization Tokens and these need to be inserted through the Text Editor UI.
Salesforce/Pardot
Pardot calls them Variable Tags and you may need to create these fields yourself depending on how your environment is set up. Please refer to Pardot support articles for specifics.
Things to be Aware of
You should not add attendees whom you want to use quick registration links into the Welcome Attendees Tab, manually, via an integration, or CSV upload. Additionally, this feature will NOT work for speakers. Please pre-register your speakers and send them One-Click Links.
Rather, you should send out quick-registration links in emails that come from your marketing automation tool and let the attendee's action of clicking the quick registration link load them into the Welcome attendee tab automatically.
Attendees must be very careful when sharing quick-registration links. If email verification is not required for your event, sharing these links may allow users to register and use the Welcome platform as other attendees.
Lastly, be careful about using email allow lists or deny lists together with Quick Registration. Quick Registration links will not work for users whose emails are not allowed to enter your event.
Still need help?
If none of the solutions work above and you're still experiencing issues, feel free to contact support@experiencewelcome.com or click Help at the bottom right corner of the screen.
Trending Posts
Welcome's Next Evolution: Webinars and Content at ScaleABM and Demand Generation: A match made in heaven?The Ultimate Guide on How to Integrate Organic and Paid Marketing Strategies
Stand Out By Staying In: 5 Ways To Use Brand Marketing Right Now
8 Creative Ways to Repurpose Your Webinar Content
Growth Marketing vs Demand Generation
How to Drive Qualified Pipeline and Enable Sales After Your Webinar Wraps
Loved and Trusted


