
Join 5000+ marketers that receive The Drip newsletter covering the most relevant topics in B2B marketing.
Event Dashboard Guide
The Event Dashboard is where you will spend most of your time handling the administrative portion of your event. Here you will be able to customize the different parts of the event, manage your list of attendees, speakers, and producers, collect your data, and handle recordings after the event ends.
Table of Contents
- Overview
- Event Details
- Registration
- Attendees, Speakers, and Staff
- Integrations
- Photo Booth Templates
- Agenda
- Stage Media
- Streaming
- Recordings
- Analytics
The Event Dashboard has two main sections. On the left is the Navigation Panel and on the right is the body of content. Navigation Panel is where you will be moving to and from each section. Important things to notice at the very top is a button that will open up a new tab for the Control Room (labeled "Control Room") and a "Preview As Attendee" button to see what your landing page looks like.
Overview
This is your landing page in the Event Dashboard. It contains the event link you will want to share with your attendees and speakers to get into the event, the date and time of your event, and it will also display your cover image (you can make changes to the cover image in the Brand Details section).
Event Details
Event Details is where you will set much of your event information and feature enablement.
When making edits in this section be sure to click the "SAVE" button for each section to save the changes for that section. Please note that this must be done section by section.
- Event Name - The name of the event is limited to 60 characters.
- Event Description - This is the main body of text on the event registration page. Be aware of 300 character limit, if you go beyond the limit it will interfere with the scaling of your registration page image.
- Start and End Time - Sets the time of the event. When setting the start time you are unable to set it to a time in the past or have the end time finish before the start time.
- Time Zone - This will set the default time zone for your event.
- Brand Details - after your Event is over, you can choose to direct Attendees to a custom URL of your choosing. In the Brand Details section, under the Cover Image, you will see an option to enter a Post Event Marketing URL. The Attendee will be redirected there after your Event ends.
Access type
Registration Required
- This is the default setting. This means anyone with an email can register and enter the event once the doors are open.
Email Allow List
- Think of this as "guest list only". Registrants may register only if their email domain matches an approved email domain, or imported manually into your attendee list. If the email domain is not listed in the attendee/speaker/staff list that means they cannot register.
- Additionally, you can register folks manually in the dashboard or via a CSV upload.
Domain Deny List
- Allows you to block certain email address by domain name from registering for the event.
Sign-in Methods
Allows you to customize which login methods you would like to appear on the event registration page. For a streamlined registration page, it's nice to remove options to make registering simpler for attendees.
- Google (OAuth)
- Linkedin (OAuth)
- Outlook (OAuth)
- Email and password
Registration Flow
Skip Welcome's Registration Form:
Enable this setting to allow KNOWN registrants to jump into this event without needing to confirm their information on the event's registration form.
A registrant is KNOWN if Welcome knows their name and email an identity provider like Google if "Register with Google" is used, or from a past Welcome event.
Quick Registration:
Enable this setting to allow attendees to register for this event through a quick registration link of the form shown below. This is a dynamic link that you would need to adjust based on your marketing software. This feature is not active by default reach out to support@experiencewelcome.com, for more information please check out our Quick Registration Guide.
Sample quick registration link:
https://app.experiencewelcome.com/events/RRu7mJ/quick_reg?email={email}&firstName={firstName}&lastName={lastName}
Event Customization
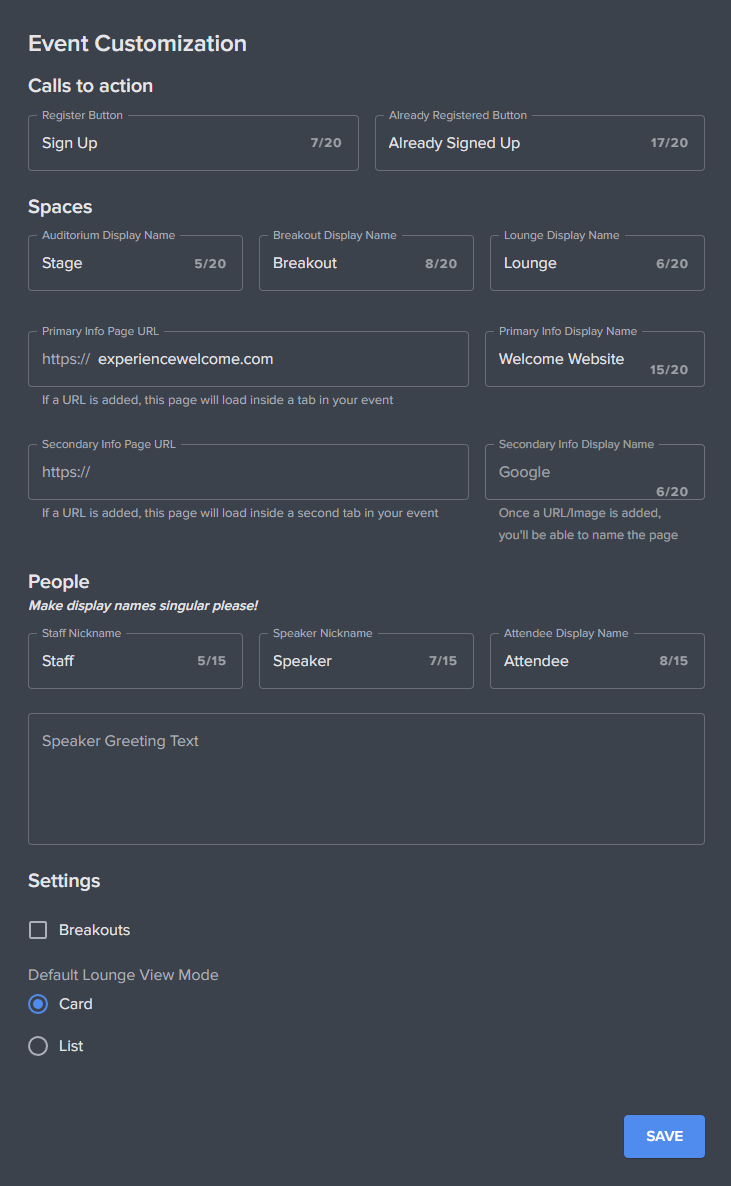
Calls to Action
Allows Customization of the Register and Already Registered Buttons on the registration page
Spaces
Allows editing the names of the "Spaces" that your users will be participating in.
- Auditorium - Name of the main stage.
- Breakouts - Name of the private/curated rooms that require invites by the producers. Please check out our Breakout Room Guide for further details.
- Lounges - Name of the casual rooms attendees can jump in and out at their leisure. Please check out our Lounge Guide for further details.
Primary/Secondary Info Tabs
- This creates additional tabs in the event that are linked to website URLs that are then embedded into the event.
- The website you are linking to will need "iframing" for it to work. Most large public websites will not have this option on so you won't be able to link them. You can use https://iframetester.com/ to check if your website is compatible.
- When adding the URL please do not include HTTPS:// as it's already included. Adding this a second time will cause the page to not load.
- Check out our Info Tab Guide for complete details.
People
You can edit the names of the "people" to whatever you like. This functions exactly like the "Spaces".
- Staff, Speaker, and Attendee are the default options.
- Speaker Greeting Text - Add a custom greeting for your speakers when they first enter the event.
Settings
Breakouts - Enable curated Rooms that producers assign users to.
- Even if they are turned on, you do not need to use them come event time.
- Check out our Breakout Room Guide article for further details.
Default Lounge View Mode
You can choose the default settings of what you would like attendees to see when they enter the Lounge space. Attendees still have the option to swap between either option when viewing the Lounges.
Brand Details
Primary/Secondary Colors
- Primary color - While in the event it is the color for the top banner in the event for the attendees, the user role color in the communication panel, and the background color when polls are put on stage. On the Registration page it will be the accent colors in the agenda section.
- Secondary color - While in the event the color applied to automatic lower thirds if you have them enabled, and the color for the stage navigation panel for multi track events. On the registration page the color for buttons and bottom color on the registration page. You will also see this as an accent color in the registration emails.
- Note you can use a Hex Color code, or you can also click on the color box and a color wheel will pop up and you can pick a color.
Images
- Logo - Appears at the top left corner of the registration page.
- Icon - Appears at the top left corner of the event page. Please note that this is not visible in the producer's view.
- Cover Image - Primary image that will appear next to your event/stage description for your event landing pages.
- Please read our article regarding Graphics and Video Dimensions if you have questions on recommended sizing for these images.
Agenda
You can toggle if you want the agenda to require registering for the event to view it. For more details on how to create an agenda for your event check out our Agenda Guide.
Event Recordings
Event Recordings can be downloaded or used in our Video On Demand feature. Using this feature will allow you to make your event recording accessible through the event link after the event has concluded.
- Make recordings available - Turns on the feature.
- Auto-publish recordings - Automates the release of the recording after it has been processed in the backend.
- Require registration - Allows only those that have registered for the event to see the recordings.
Other Features
Duplicate Event - Creates a copy of the event in your organization dashboard.
Delete Event - Removes the event and all its assets (this CANNOT be undone).
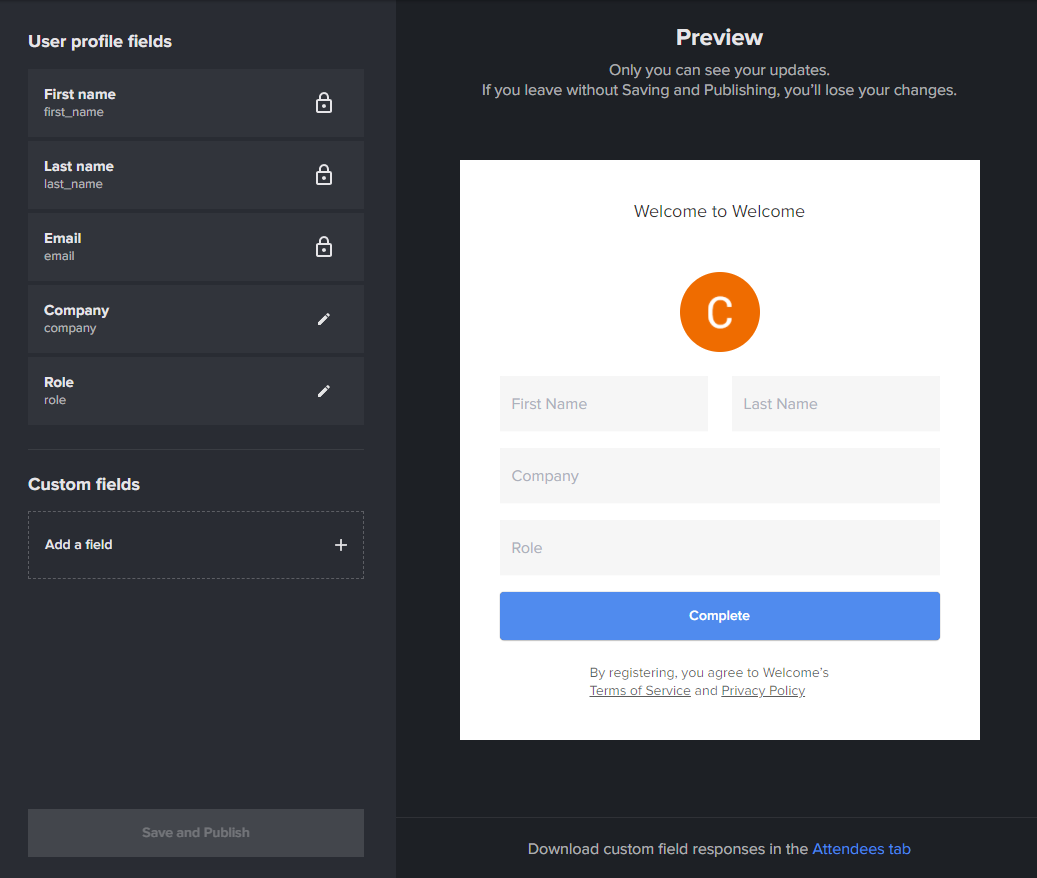
Registration
Custom Registration fields can be created and set here. This is a useful way to gather information about your attendees.
People - Attendees, Speakers, and Staff
This is where you manage the users of your event. If needed, you can change the name of these in "Event Details". Anyone except staff who registers will default as an Attendee. Speakers will either need to be added manually or promoted from attendee to speaker after they have registered. The interface for each of the user types are largely the same with minor differences. Let's dive into the different functions and note the differences as we go.
Sending Invites
You have multiple ways to send invites from this section ranging from bulk groups to individual users.
Sending invites in bulk can simply be done by clicking the "Send Invites" button at the top right corner. This will send invites to all those with an unconfirmed status. This feature is unavailable for Staff.
If you have a group of specific users you would like to send to you can do so by checking the boxes next to their names then clicking "Send Invite(s)"
Lastly, you can either send a One-Click Link to a user via email or copy and paste it to the user with whatever method you would like to do it. To do so you will see an Action Column to the right of every user.
Clicking on the 3 stacked dots at the far right will reveal a drop-down. Select One Click Link options that fit best for you. One-Click Links will allow users to jump straight into events with the least amount of registration friction. You can check out our One-Click Registration Link Guide for further details.
Managing Users
This is where you can add, modify, and remove users specific to this event. Along with altering user permission roles. You can manage users/permissions at the ORG LEVEL and who has access to Welcome here: https://www.experiencewelcome.com/help/managing-and-adding-users-in-welcome
Adding User(s) to the Webinar or Virtual Event
Adding a user or users can be done in one of two ways. Either manually one by one or in bulk via a CSV upload.
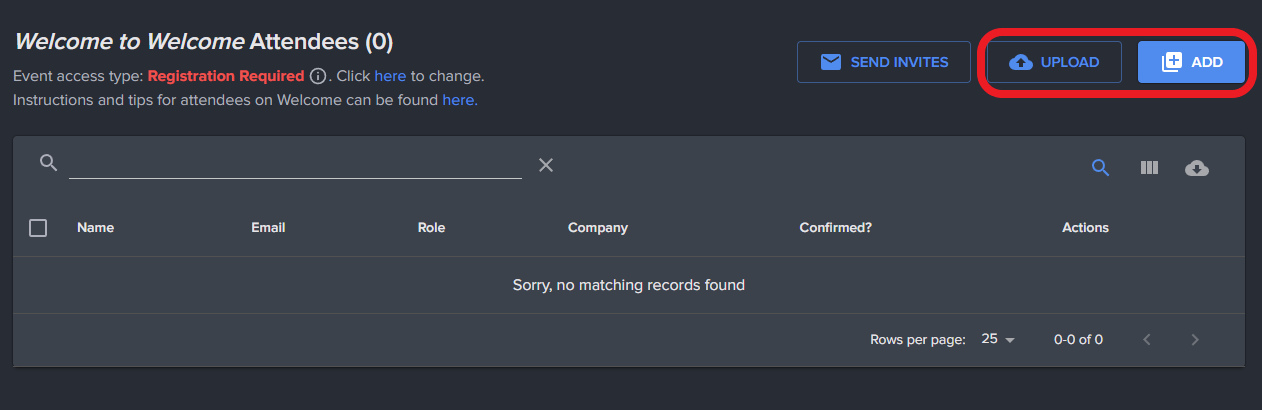
Adding an individual user is pretty straightforward. You can click the "Add" button at the top right and a pop-up will appear for you to fill out. The required fields for creating an account are first name, last name, and email address; you do not need to add in a user's role/company or image to create an account. You will not be able to add anyone for Staff; instead, Staff users can simply login to the event and they will automatically populate.
Adding users in bulk can be done with a CSV upload by clicking the "Upload" button at the top right to access the pop-up. We have a specific template and instructions for the uploads that you will need to use (the only required fields are first name, last name, and email address). You can review our CSV Uploads (Attendees/Speakers) article regarding the details.
You are also able to download a CSV of the users that you have in your people list by clicking the download cloud button all the way to the right. You are able to download up to 25k entries.
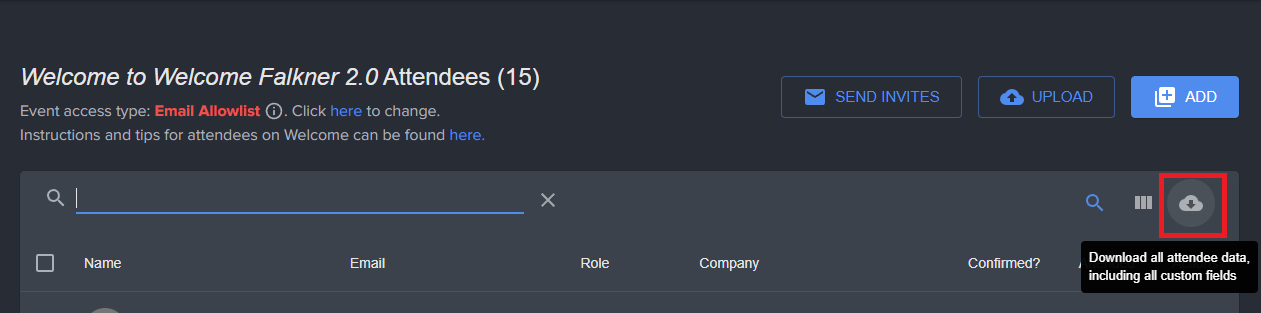
It will contain these columns:
- First Name
- Last Name
- Role
- Company
- Confirmed?
- Attended?
- Registered At
- One-Click Registration Link
- Any custom registration fields for the event
Modifying User(s)
You can modify two key areas, one being the user profile information and the second being able to promote user roles from attendee to speaker and back.
- Editing user profiles can be done by clicking the 3 stacked dots in the action column to the far right. A drop-down will appear and an "Edit" option will be available. You will only be able to edit name, role, and company fields. If you have custom fields as part of your registration they will not be editable.
- Promoting an attendee to a speaker can be done by clicking the 3 stacked dots in the action column to the far right of the users row. A drop down will appear and you will be able to select "convert to speaker". The same can do the same for speakers to swap them to an attendee. This function is not available for Staff.
The email section allows you to set up and schedule email reminders 24 hours and 1 hour before the event begins. These reminder emails will contain the user's unique One-Click Link for easy access to your event. You are able to set up either option individually and you will also have a preview button for either to send a test example to your own email to view what it would look like.

Integrations
Integrations are now managed at the org level. Please search and review the specific integration article (hubspot, SFDC, etc) you are looking for in our support center.
Photo Booth Templates
Photo booths are a fun feature built into Breakouts and Lounges that mimic being in a photo booth you would find at events, parties, and conventions. Here you will be able to upload custom background images for you attendees to select prior to taking a picture.
- This is where you would upload your default template. The image must be 1080x1350 PNG, JPEG images. Our Graphic Templates and Examples article has template examples to base your designs around.
Agenda
You will be able to build an agenda via the Agenda Builder within the Welcome Studio. The agenda can be viewable on both the landing page and within the event. The agenda will showcase time ranges, session name, and a brief description of what the session will be. Please check out our Agenda Guide for specific details.
Stage Media
This is the area where you will upload your media assets, it is the ideal place to upload them in bulk. You are still be able to upload assets via the Control Room if needed.
Files are sorted alphabetically from top to bottom:
- Background Images - These appear behind your speakers and slides, or as interstitials in between different sessions. 16:9 1920x1080; PNG, JPEG, GIF, SVG
- Overlay Images - You can put overlays on stage to provide supplemental information and branding. 16:9 1920x1080; PNG, GIF, SVG
- Logos - These appear unobtrusively in the bottom right corner of the stage. Keep these to 200x200, PNG
- Videos - Videos can be interspersed with live feeds of your speakers. 1GB limit, 16:9 ratio, 720p, MP4
- Music- Long audio files (greater than 8 seconds) to be played during your event. MP3 only
- Sound Effects - Short audio files (less than 8 seconds) to be played during your event. MP3 only
Checkout our stage kit guide for the build in assets we have within our Welcome Studio.
Recordings
Recordings section will display all your recordings that have been created in the event. Each recording will have a "Download Recording" button to download it (there is also a "Download Subtitles" for an SRT file of the recording). If you click on the thumbnail you will be able to stream the video in a different tab. The recordings will be 720p at 60fps H264 codec MP4 files. Check out our Video On Demand Guide for further details.
Analytics
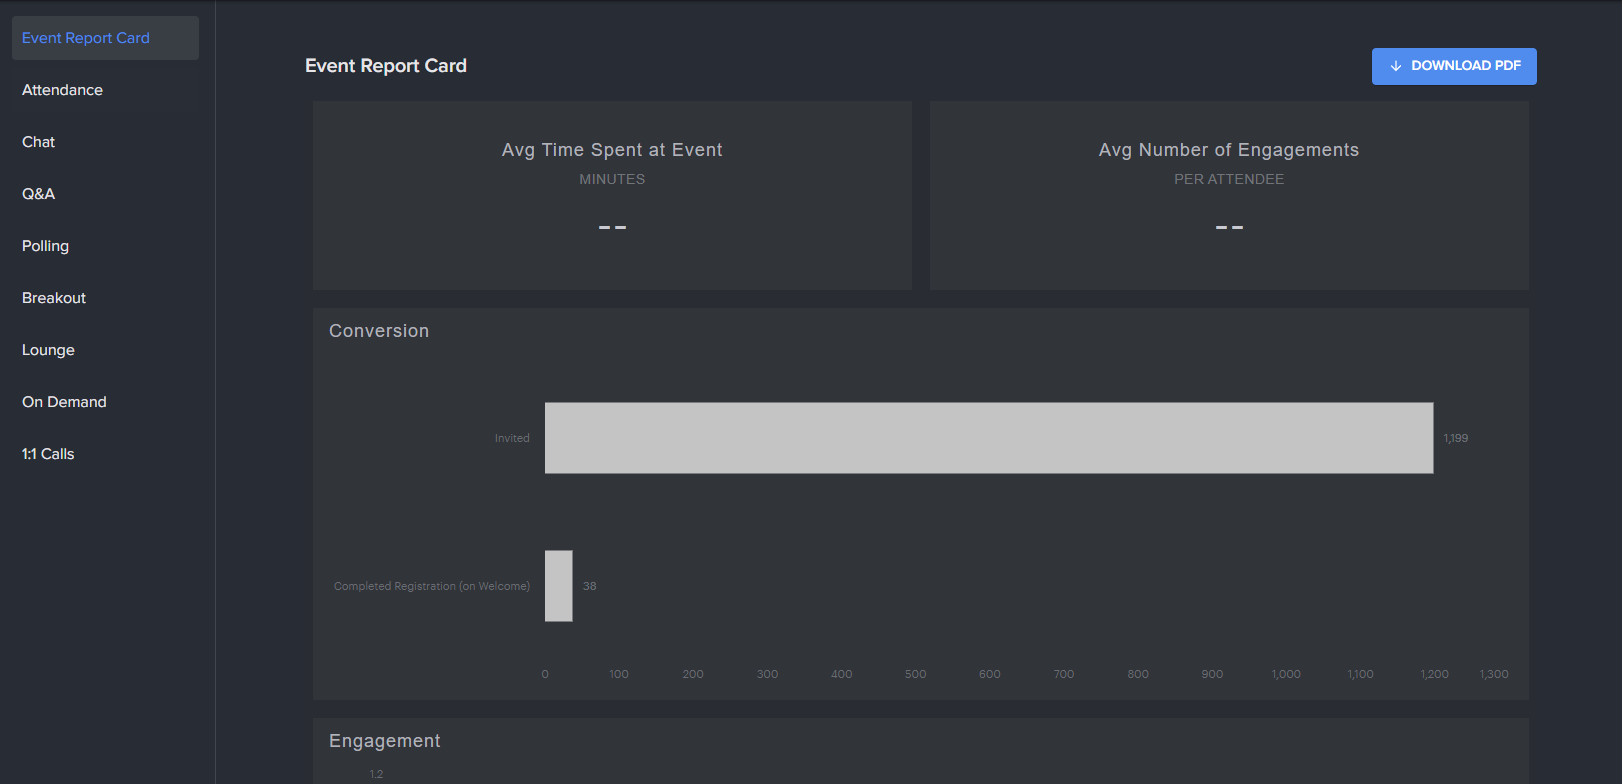
Our Analytics Dashboard will allow you to see and download a CSV of the data for the various parts of the event. We have this Analytics Guide that goes into more detail.
- You can get data for Attendance, Chat, Q&A, Polling, Breakouts, and Lounges
- Data will be available around 90 minutes after your event ends (please note that this is tied to the event time; for multi-day events this means the end of the entire event).
- Multi-track events are currently not fully self-serve for analytics. Please email support@experiencewelcome.com with any requests for multi-track analytics and we will pull that information for you.
Multi-Track Events
Turning your event into a multi-track event that will support multiple tracks or stages. Please check out our Multi-Track guide for more details.
Still need help?
If none of the solutions work above and you're still experiencing issues, feel free to contact support@experiencewelcome.com or click Help at the bottom right corner of the screen.
To learn more about our webinar and virtual event features, click here: https://www.experiencewelcome.com/features
Trending Posts
Welcome's Next Evolution: Webinars and Content at ScaleABM and Demand Generation: A match made in heaven?The Ultimate Guide on How to Integrate Organic and Paid Marketing Strategies
Stand Out By Staying In: 5 Ways To Use Brand Marketing Right Now
8 Creative Ways to Repurpose Your Webinar Content
Growth Marketing vs Demand Generation
How to Drive Qualified Pipeline and Enable Sales After Your Webinar Wraps
Loved and Trusted


