Add "Custom Fields"to your Registration Form for your Webinar or Virtual Event
Navigate to the “Registration Options”>”Form” page.

From here you will be able to add and edit “Custom fields” for additional data capturing.

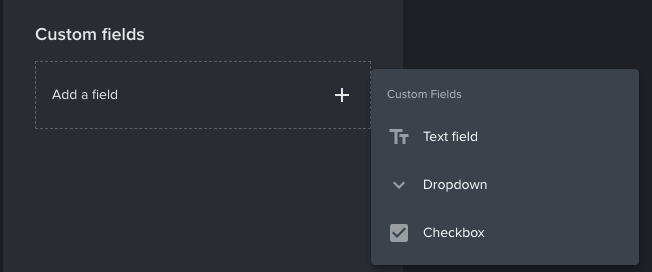
After you select “Add a field” you will be prompted with three field type options to choose from.

Select the type of field you want to add to the registration form.
Text fields are typically used to capture free form text information. Such as “what is a question you have for our speakers?”
Dropdowns are for more structured data capture. Such as “Do you want to receive follow up communications about this webinar or event?” Or, “Select a gift for registering”.
Checkboxes are also used for structured data capture. Such as “I agree to receive marketing email communications from company XYZ.”
Note: The first five custom fields added can be mapped to custom fields in your CRM or Marketing Automation platform such as Salesforce or Hubspot. All data can always be downloaded as a CSV from the Registrations>Attendees page.

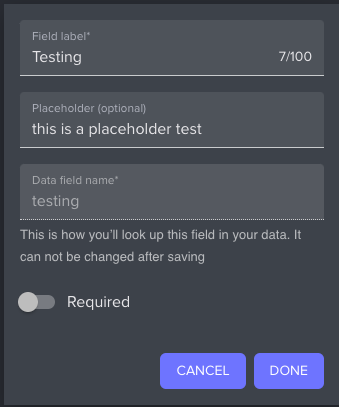
For each custom field, you can choose to make it required or not to register, change the field label, show placeholder text, and view the “Data field name” which is used for mapping data through integrations.
Any changes you make will be previewable on the right panel.
Select “Save and Publish” at the bottom of the screen when you are done.


